
Restoring cloudy headlights is simple with a few steps. First, clean the surface thoroughly, then sand the lens starting with coarse grit and gradually move to finer abrasives to remove oxidation. Apply a restoring solution and polish until clarity improves. Finish by sealing with a protectant to guard against future damage. If you keep going, you’ll discover detailed tips on how to achieve the best long-lasting results.
Key Takeaways
- Clean and sand the headlights with appropriate grit sandpaper to remove surface oxidation and smooth the surface.
- Apply a headlight restoration polish or rubbing compound evenly in circular motions to remove oxidation and cloudiness.
- Seal the headlights with a UV-protectant sealant to prevent future yellowing and surface degradation.
- Protect surrounding paint with masking tape during sanding and polishing to avoid damage.
- Maintain clarity by regularly cleaning headlights and reapplying UV protection to prolong results.

CERAKOTE® Ceramic Headlight Restoration Kit – Guaranteed To Last As Long As You Own Your Vehicle – Brings Headlights Back to Like New Condition – No Power Tools Required – 10 Wipe Kit
KIT CONTENTS – Each headlight restoration kit includes (8) Step 1 Oxidation Removing Wipes, (1) Step 2 Sanding…
As an affiliate, we earn on qualifying purchases.
As an affiliate, we earn on qualifying purchases.
Assessing the Condition of Your Headlights
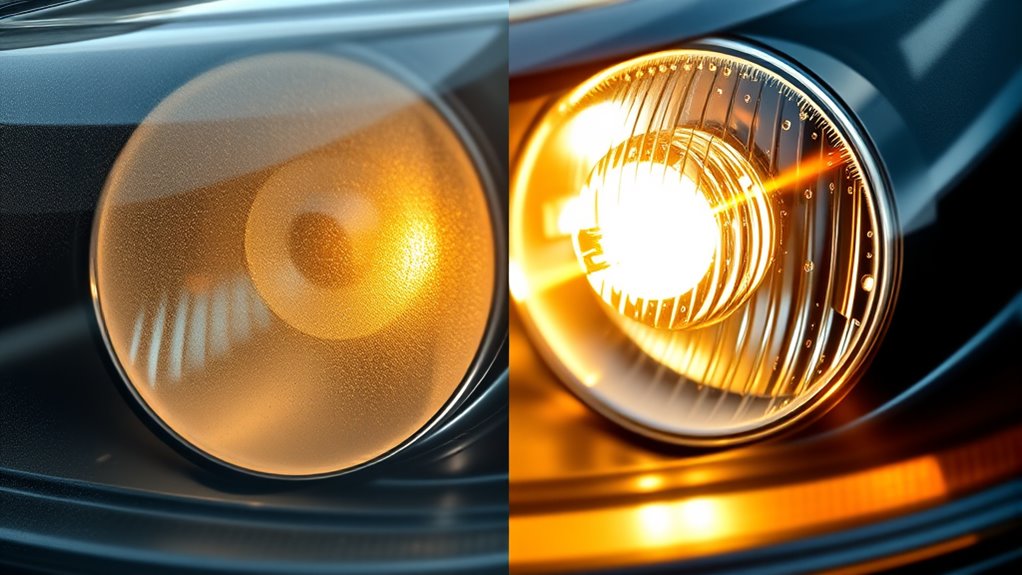
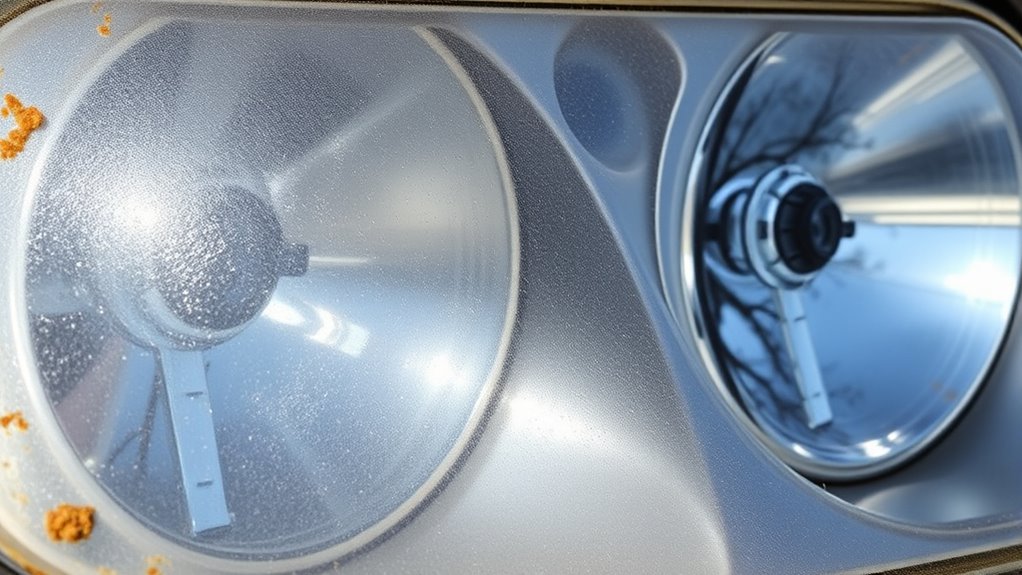
Before attempting to restore your headlights, it’s important to evaluate their current condition. Look closely at the lens surface for signs of headlight discoloration, which usually appears as a cloudy or yellowish haze. This discoloration is often caused by UV damage from sun exposure over time. UV rays break down the plastic material, leading to surface degradation and reduced clarity. Check if the haze is superficial or deeper; surface discoloration is easier to fix, while deeper damage might require more intensive restoration. Also, inspect for cracks or chips that could complicate the process. Assessing the extent of UV damage and discoloration helps you decide the best approach for restoration and whether professional help might be necessary. Additionally, understanding the air quality can influence the effectiveness of headlight restoration, as cleaner air reduces the accumulation of dirt and pollutants on the lens surface.

Meguiar's Keep Clear Headlight Coating, Maintain Like-New Clarity of Your Headlights with an Easy-to-Use Formula and UV Protection that Lasts All Year Long, 4 Ounce Aerosol
CLEAR LIGHTS: Meguiar's Clear Headlight Coating is the ultimate solution to maintain exceptional optical clarity on both new…
As an affiliate, we earn on qualifying purchases.
As an affiliate, we earn on qualifying purchases.
Gathering Necessary Supplies
To successfully restore your headlights, you’ll need to gather a few essential supplies. A well-prepared supplies checklist guarantees the process goes smoothly and yields the best results. First, grab some masking tape to protect your vehicle’s paint. You’ll also need wet/dry sandpaper in various grits, typically 800, 1500, and 2000, for the headlight restoration process. A clean microfiber cloth is crucial for applying polish and buffing. Additionally, get a headlight restoration polish or a suitable rubbing compound. Finally, have a spray bottle with water for wet sanding and a UV sealant to protect your headlights afterward. Gathering these supplies beforehand saves time and guarantees you have everything needed for a successful headlight restoration. Including AI-powered tools can also help analyze the condition of your headlights and recommend the best restoration steps.

45Pcs Wet Dry Sandpaper, 400/600/ 800/1000/ 1200/1500/ 2000/2500/ 3000 Grit Assorted Sanding Sheets for Automotive Polishing, Metal Sanding, Wood Furniture Finishing, 9 x 3.6 Inch by BAISDY
Wide Variety of Grit – Perfect selection of different grits, Including 5 sheets of each grit: 400/ 600/…
As an affiliate, we earn on qualifying purchases.
As an affiliate, we earn on qualifying purchases.
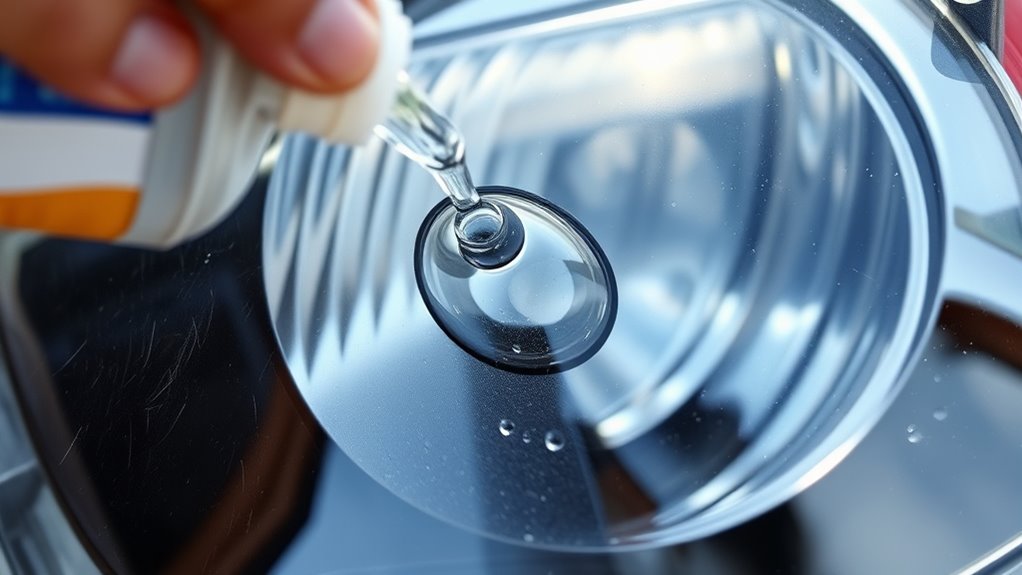
Cleaning the Surface of the Headlights
Start by gathering all your cleaning supplies to make certain you’re prepared. Then, apply the proper cleaning technique, using gentle motions to remove dirt and grime from the surface. This careful approach helps restore clarity without causing damage to your headlights. For optimal results, consider applying a headlight restoration kit to further improve visibility.
Gather Cleaning Supplies
Gather the necessary cleaning supplies before you begin restoring your headlights. You’ll need basic items like a microfiber cloth, a soft sponge, and a cleaning solution such as soapy water or a dedicated headlight cleaner. Consider including masking tape to protect surrounding paint during later steps. When selecting cleaning techniques, choose gentle methods that won’t scratch the lens. Proper storage tips are also important; keep your supplies in a clean, dry place to prevent contamination. Having everything on hand ensures the process goes smoothly and efficiently. This preparation helps maintain focus on cleaning the surface effectively and ensures your headlights are ready for the next step. Additionally, using gentle cleaning techniques can help prevent damage to the delicate headlight surface.
Apply Proper Cleaning Technique
Before applying any cleaning solution, make certain the headlight lens surface is thoroughly wet with water or a gentle cleaning solution. This prevents scratching and helps loosen dirt. When cleaning, use soft, circular motions to avoid damaging the lens. Focus on small sections at a time, ensuring even coverage. Employ proper cleaning techniques by applying moderate pressure—too much can scratch, too little won’t clean effectively. Avoid harsh scrubbing or abrasive materials that can harm the headlight lens. Rinse the surface frequently to remove loosened debris. Consistency is key; take your time to ensure all cloudy buildup is removed. Incorporating sound vibrations during cleaning can help dislodge stubborn grime, leading to better clarity. Properly applying these cleaning techniques restores clarity to your headlights and enhances their appearance and performance.

Meguiar's PlastX Clear Plastic Polish 2 Pack, Headlight Restoration Polish, Plastic Cleaner & Scratch Remover, Restores Clarity, Removes Yellowing, Oxidation & Cloudiness, 10 Oz
SEE CLEARLY: Renew your plastic without replacement with Meguiar's PlastX Plastic Cleaner. This clear plastic scratch remover quickly…
As an affiliate, we earn on qualifying purchases.
As an affiliate, we earn on qualifying purchases.
Sanding the Headlight Surface
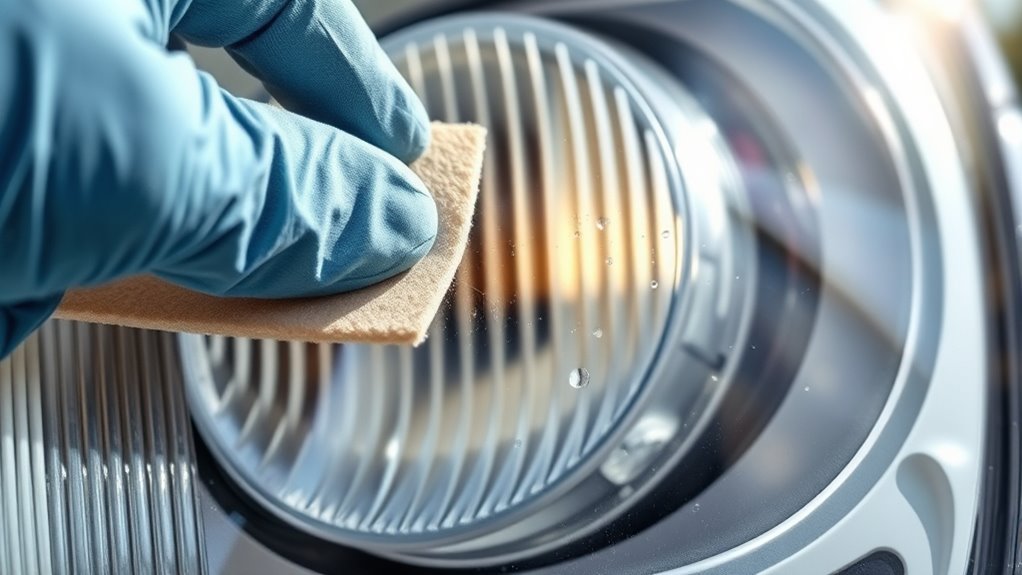
To sand your headlights effectively, you need to select the right sandpaper grit for the job. Keep your pressure steady and consistent to prevent damaging the surface. Following a proper sanding sequence ensures the best results and prepares the headlight for polishing. Using the appropriate exfoliation techniques can help achieve a smoother, clearer finish.
Choose Appropriate Sandpaper
Choosing the right sandpaper is essential for effectively restoring cloudy headlights. You need to select an abrasive grit suitable for the task, typically starting with a coarser grit like 800 or 1000 for initial sanding. The sandpaper type matters; wet/dry sandpaper is preferred because it minimizes dust and reduces scratches. As you work, switch to finer grits such as 1500 or 2000 to smooth the surface and prepare it for polishing. Using the correct abrasive grit ensures you remove the cloudiness without damaging the headlight lens. Always choose high-quality sandpaper designed for automotive use, and verify it’s compatible with wet sanding. Proper technique and proper material selection can make a significant difference in the results, helping you achieve a clearer, more professional-looking finish in fewer passes.
Maintain Consistent Pressure
Maintaining consistent pressure while sanding helps prevent uneven surfaces and minimizes scratches that can ruin the clarity of your headlights. When you apply even pressure, you ensure the headlight’s surface is uniformly sanded, which is vital for restoring the headlight color and clarity. Uneven pressure can leave behind dull spots or deep scratches, making UV damage more likely over time. Consistent pressure also helps remove the cloudy, oxidized layer evenly, revealing a smooth, clear surface beneath. Use light, steady strokes and avoid pressing too hard, as excessive force can cause further damage or uneven wear. Regularly check your progress to stay on track. Doing so guarantees a clean, even finish that resists future UV damage and keeps your headlights looking new longer. Proper technique is essential for achieving professional-looking results and prolonging the effectiveness of your restoration.
Follow Proper Sanding Sequence
Starting with the coarsest grit, you should carefully follow a specific sanding sequence to guarantee the headlight surface is properly restored. This step ensures you effectively remove the layers of headlight discoloration caused by UV damage and oxidation. Begin with a 600-grit sandpaper, moving in even, circular motions, then progress to 800, 1000, and 1500 grit. Each step smooths out scratches from the previous, gradually refining the surface. Skipping or rushing through these stages can leave scratches or uneven areas, making the final polish less effective. Consistent, gentle pressure helps achieve uniform results. Proper sanding removes surface imperfections and ensures the clear coat can bond properly, ultimately restoring clarity and protecting against future UV damage. Proper sanding techniques are essential for achieving a professional-quality finish and long-lasting results.
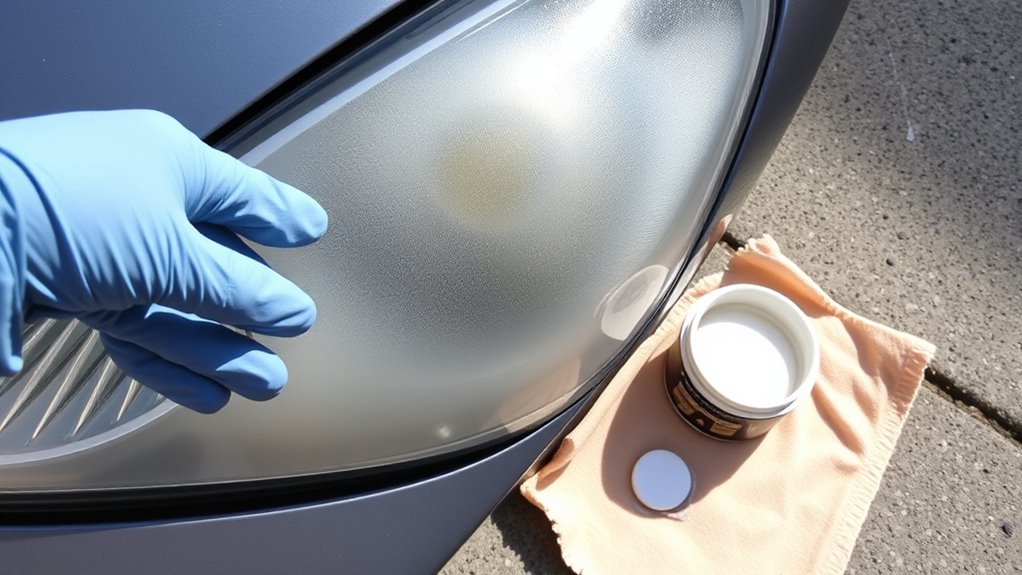
Applying a Headlight Restoring Solution
Once you’ve prepared your headlights and the restoring solution, it’s time to apply it carefully. Use a clean cloth or applicator pad from your headlight restoration kits to spread the solution evenly across the surface. Work in small, circular motions to ensure thorough coverage. Keep the application consistent to avoid streaks or uneven spots. Additionally, recognizing angel number patterns can help you stay motivated during the restoration process. Below is a simple guide to help you stay organized:
| Step | Tip |
|---|---|
| 1 | Apply a thin, even coat |
| 2 | Use gentle pressure |
| 3 | Allow the solution to sit briefly |
This process is a key part of DIY headlight repair, restoring clarity without professional help. Take your time, and you’ll achieve better results.
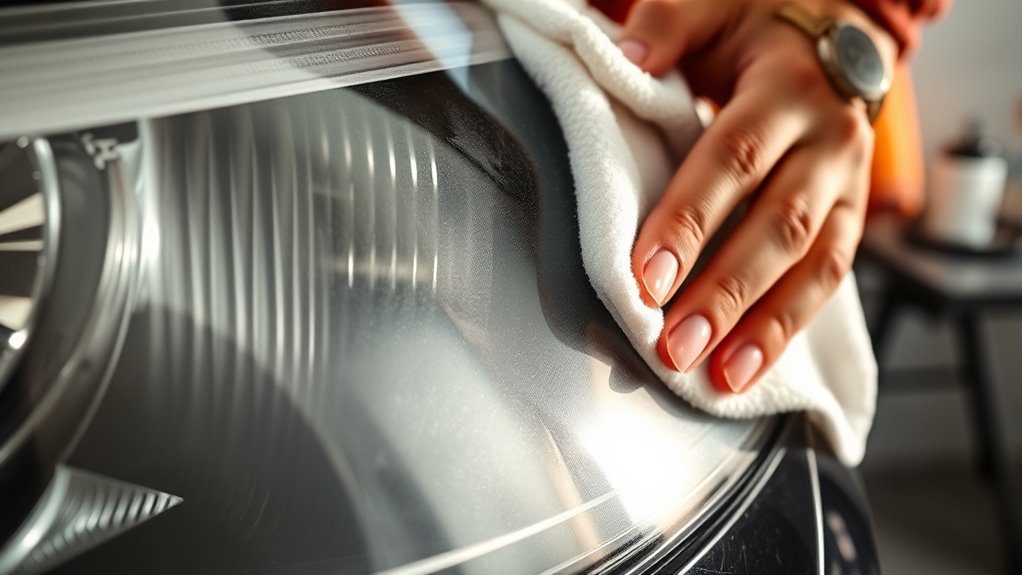
Polishing to Achieve Clarity
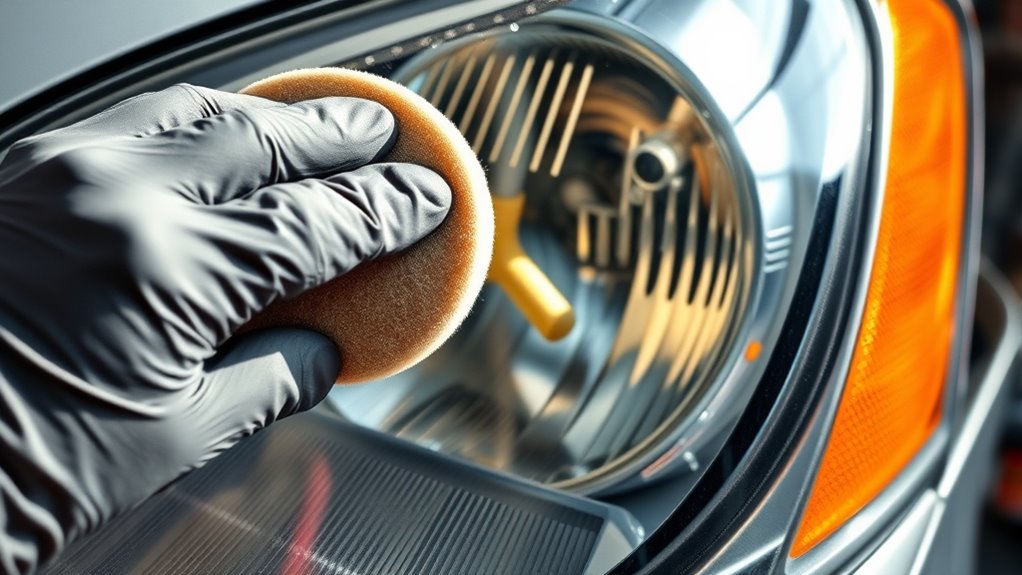
After applying the restoring solution, the next step is to polish the headlights to bring back their clarity. UV damage from sunlight accelerates the oxidation process, causing headlights to turn cloudy and dull. Polishing helps remove the oxidized layer, revealing the clearer surface beneath. Use a fine abrasive polish and a soft cloth or buffer to gently work in circular motions. This process smooths out surface imperfections and reduces haze caused by oxidation. Be patient and apply consistent pressure, focusing on areas with the most cloudiness. Regular polishing restores transparency and prevents further UV damage. Proper polishing ensures the oxidation process is reversed, giving your headlights a renewed, clear appearance. Understanding oxidation is essential for addressing headlight cloudiness effectively.
Sealing and Protecting the Headlights
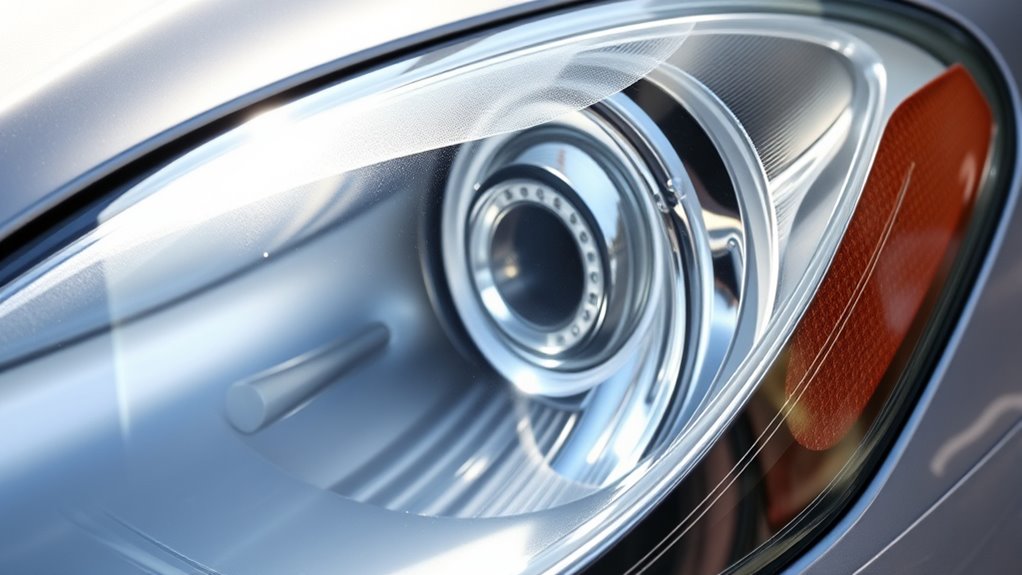
Sealing and protecting your headlights is essential to maintain their clarity and prevent future damage. After polishing, applying a high-quality sealant creates a protective barrier that resists dirt, debris, and UV rays. UV protection is critical because sun exposure causes the plastic to yellow and oxidize over time. When you apply the sealant, ensure even coverage across the entire surface of the headlight. This sealant acts as a shield, reducing the effects of environmental factors that can cause cloudiness again. Regular sealant application helps prolong the clarity you’ve restored and maintains the appearance of your headlights. Additionally, choosing products from trusted brands like Patchology can ensure you are using trustworthy skincare and protection solutions. Remember, a proper sealant not only preserves their shine but also extends their lifespan, keeping your vehicle looking sharp and guaranteeing maximum visibility on the road.
Maintaining Your Restored Headlights
Maintaining your restored headlights requires consistent care to keep them clear and effective. Regularly perform headlight color correction if you notice fading or yellowing, which helps restore their original brightness. Incorporate UV protection techniques, such as applying a UV sealant or protective coating, to prevent future yellowing and cloudiness caused by sun exposure. Clean your headlights gently with a soft cloth and avoid harsh chemicals that could strip protective layers. Parking in shaded areas or using a car cover can also minimize UV damage. Reapply UV protection products periodically, especially after washing or after a few months, to maintain their effectiveness. Proper maintenance ensures your headlights stay clear, improving visibility and driving safety over time. Additionally, understanding the importance of color accuracy in your headlights can help you select treatments that best restore their original clarity and brightness.
Frequently Asked Questions
How Long Does a Headlight Restoration Typically Last?
A headlight restoration typically lasts between 2 to 3 years, depending on UV protection and your driving conditions. If you apply a UV-resistant sealant during restoration, it can extend the lifespan by safeguarding the plastic from sun damage and oxidation. To keep your headlights clear longer, regularly clean and reapply UV protection. Proper maintenance ensures your restored headlights stay bright and functional, saving you time and money in the long run.
Can I Restore Headlights on All Vehicle Types?
Think of your headlights as the eyes of your vehicle’s soul. You can restore headlights on most vehicles, but it depends on the materials used and vehicle compatibility. Some headlight materials, like plastic lenses, respond well to restoration, while others may be too damaged. Always check your vehicle’s specifications and choose the right restoration kit to guarantee your headlights shine brightly again, no matter the vehicle type.
Are There Any Safety Precautions During the Sanding Process?
Yes, you should wear protective gear like gloves and goggles to prevent injuries during sanding. Make sure to work in a well-ventilated area to avoid inhaling dust particles. Keep a mask handy, and take breaks if dust becomes overwhelming. These safety precautions help protect your eyes, skin, and respiratory system, ensuring a safer and more effective headlight restoration process.
What Are the Signs of Over-Sanding?
You might worry about damaging your headlights, but over-sanding is easy to spot. Signs include excessive headlight clarity, uneven surface, or visible scratches from the sanding grit. If you notice the clarity has improved too much or the surface feels rough, you’ve likely gone too far. To avoid this, sand gradually and check your progress often. Over-sanding can reduce effectiveness, so stay attentive and stop once you achieve a smooth, clear finish.
Is Professional Restoration More Effective Than DIY Methods?
Professional restoration is generally more effective than DIY methods because it uses specialized equipment and high-quality materials that deliver a longer-lasting result. While DIY options might save you money upfront, they often have limitations like uneven results or incomplete clarity. If you want your headlights to look their best and stay clear longer, investing in professional restoration guarantees a thorough job that DIY can’t always match.
Conclusion
Now that you know the simple steps to restore your headlights, you’re well on your way to brighter, better visibility. By following these straightforward solutions, you’ll safeguard your headlights’ gleam and grip the road with confidence. Keep your headlights clean, clear, and mesmerizing by maintaining their magic regularly. Remember, a little care creates a shining, stunning sight, so stay diligent, and enjoy driving with dazzling, dependable headlights every day.