
To improve your TV picture, start by understanding your display’s picture settings, including resolution and picture modes. Use built-in calibration tools or test patterns to fine-tune brightness, contrast, and color accuracy for natural hues and depth. Adjust sharpness carefully for clarity without halos, and manage motion settings for smooth playback. Guarantee proper aspect ratio and screen size to reduce distortion. Mastering these basics will help create a more vivid, eye-pleasing picture; keep exploring to learn more details.
Key Takeaways
- Use test patterns and calibration discs to accurately adjust brightness, contrast, and color settings.
- Match picture modes to your viewing environment for optimal color accuracy and contrast.
- Fine-tune motion, sharpness, and aspect ratio to achieve natural, clear images without artifacts.
- Adjust ambient lighting and backlight settings to reduce eye strain and enhance picture quality.
- Save calibration profiles and recalibrate periodically for consistent, high-quality viewing.

TV Calibration & Test Patterns for Fire TV – Display Test, Overscan, Brightness, Color Bars, Audio Sync & Speaker Check
1. Check overscan and missing screen edges.
As an affiliate, we earn on qualifying purchases.
As an affiliate, we earn on qualifying purchases.
Understanding Your TV’s Picture Settings
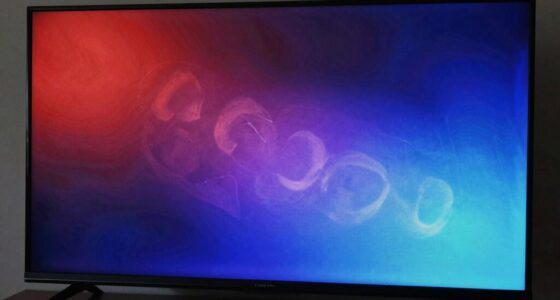
Have you ever wondered what all those picture settings on your TV actually do? Understanding your TV’s picture settings is key to optimizing your viewing experience. Start with TV resolution; it determines how sharp and detailed the image appears. Higher resolutions like 4K or 8K offer crisper visuals, while lower ones may look less clear. Adjusting picture modes like Standard, Cinema, or Vivid can enhance color accuracy and contrast. Don’t forget sound calibration—though it’s separate, it complements picture quality by balancing audio levels. Familiarize yourself with options like brightness, contrast, and color temperature, as these directly impact picture quality. Proper calibration can significantly improve your viewing experience, ensuring that colors and contrast are true to life. Taking the time to understand these settings helps you get the most out of your TV, whether you’re watching movies or gaming.

Spears & Munsil HD Benchmark and Calibration Disc 2nd Edition
All features of the first edition disc
As an affiliate, we earn on qualifying purchases.
As an affiliate, we earn on qualifying purchases.
Using Built-in Calibration Tools
Many modern TVs come with built-in calibration tools that make fine-tuning your picture easier and more accessible. These tools often include options to improve brightness uniformity across the screen, helping to eliminate dark spots or uneven lighting. Using these features, you can adjust settings precisely without needing external equipment. Some models also offer sound calibration tools, allowing you to optimize audio levels and quality directly through your TV’s menu. These automated adjustments ensure a balanced picture and sound experience, saving you time and effort. While these built-in tools are useful for quick calibration, they work best when complemented with manual adjustments for fine-tuning. Additionally, understanding AI security vulnerabilities can help you stay informed about potential risks associated with smart devices. Overall, they provide a convenient way to enhance your viewing experience without requiring professional assistance.

ADAS Calibration Dynamic ACC Positioning Tool for Eyeball Unit, Angso-auto Angle Leveling Tool Accessory for Auto
The ANGSO-AUTO leveling tool is designed to be powered by 2* AAA 1.5 V batteries (Please note that…
As an affiliate, we earn on qualifying purchases.
As an affiliate, we earn on qualifying purchases.
Adjusting Brightness and Contrast for Optimal Depth

Adjusting brightness and contrast is essential for achieving a sense of depth and realism in your picture. Proper settings make details pop and prevent images from looking flat or washed out. When you optimize these controls, you’ll notice improved clarity during fast-moving scenes or dark scenes, especially in video game mode. Ambient light in your room influences how your TV appears; too much light can wash out details, so adjust contrast accordingly. Use test patterns or picture settings to find the balance.
| Brightness | Controls overall darkness or lightness of black levels |
|---|---|
| Contrast | Adjusts the difference between dark and bright areas |
| Ambient Light | Affects perception of picture depth in the room |
| Video Game Mode | Enhances contrast and response time for gaming |
| Room Lighting | Impacts how settings should be fine-tuned |

Calibrite Display 123 Monitor Calibration Colorimeter for Photo Editing and Color Accurate Viewing, Easy 1 2 3 Software Workflow, USB C Connection, and Before and After Check, Supports 2 Displays
SPECIFICATIONS: Monitor calibration colorimeter with Easy 1 2 3 software workflow, USB C connection, compact body approx. 34mm…
As an affiliate, we earn on qualifying purchases.
As an affiliate, we earn on qualifying purchases.
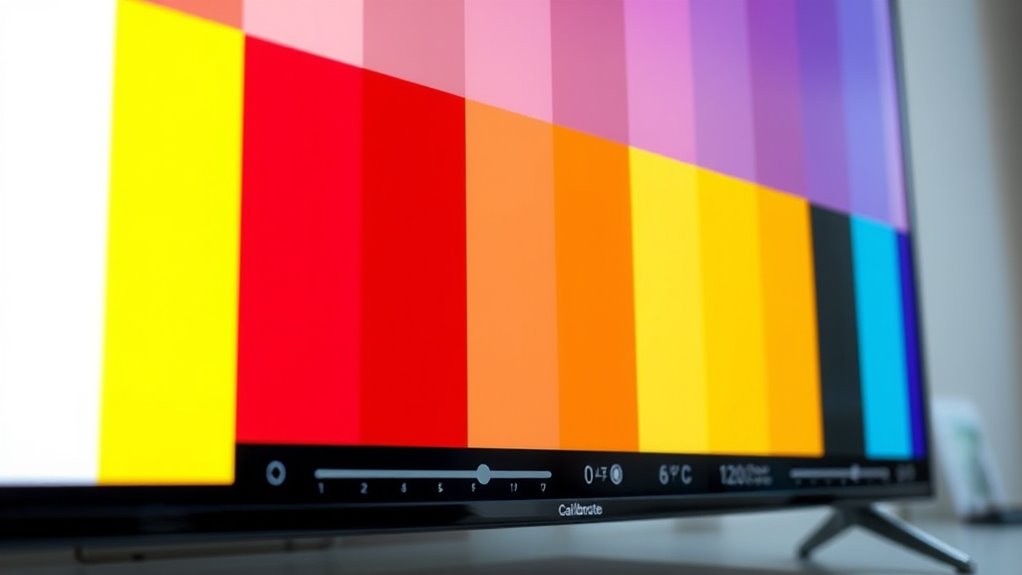
Calibrating Color and Tint for Accurate Hues

To get true-to-life colors on your TV, you need to adjust the color settings carefully. Using test patterns correctly helps you fine-tune hue and saturation for the most accurate hues. Balancing these elements guarantees your picture looks natural and vibrant.
Adjust Color Settings Properly
Properly calibrating your TV’s color and tint settings is essential to guarantee that images display with accurate hues. Focus on achieving the best color accuracy by adjusting the color settings until skin tones, landscapes, and objects look natural. Start with hue adjustment to correct any color shifts; if reds look too orange or greens appear off, tweak the hue control gently. Make certain the color saturation isn’t overly intense or dull, maintaining a balanced, true-to-life appearance. Use your eyes and reference images or test patterns if available. Avoid over-adjusting, which can distort colors and reduce realism. Precise calibration of color and tint ensures your TV produces vibrant, lifelike images, enhancing your viewing experience with accurate hues and consistent color accuracy. Additionally, understanding display calibration techniques can help you fine-tune your settings more effectively.
Use Test Patterns Correctly
Using test patterns is an essential step in calibrating your TV’s color and tint settings accurately. To get the best results, focus on test pattern interpretation, which helps you identify subtle hue differences. Keep in mind calibration pattern limitations, as some patterns may not reflect real-world content perfectly. A good understanding of visual and auditory elements can further improve your calibration process.
- Carefully observe color hues for consistency and accuracy
- Use patterns designed for color and tint adjustments, not just resolution
- Avoid over-relying on test patterns; check with actual content
- Be aware of calibration pattern limitations that might skew results
Balance Hue and Saturation
Balancing hue and saturation is essential for achieving accurate and natural-looking colors on your TV. Proper color grading ensures that skin tones, foliage, and other elements appear lifelike. Start with hue adjustment, fine-tuning the color wheel to correct any color casts or distortions. This step prevents unnatural hues and improves overall picture fidelity. Saturation control determines the intensity of colors; too high makes colors oversaturated and unrealistic, while too low results in dull images. Use test patterns to identify the ideal balance, making small adjustments until colors look true to life. Remember, subtle tweaks can make a significant difference. Additionally, understanding color perception can help you make more informed calibration choices, ensuring your picture matches what the content creators intended. By carefully calibrating hue and saturation, you enhance the viewer experience with vibrant, yet natural, colors that match the original content.
Fine-tuning Sharpness and Clarity
Adjusting the sharpness levels on your TV can make details stand out or look artificial. Focus on finding a balance that enhances clarity without introducing noise or halos around objects. Properly fine-tuning these settings guarantees your picture looks crisp and natural. For an optimal viewing experience, consider the recommended calibration settings for your specific TV model.
Adjusting Sharpness Levels
Fine-tuning the sharpness on your TV can considerably enhance picture clarity, but setting it too high or too low can lead to unwanted artifacts or a blurry image. To get the best results, focus on the sharpness adjustment to find the perfect balance. Too much sharpness can cause unnatural edges, while too little makes details fade. Pay attention to edge enhancement, which can create artificial outlines that look unrealistic. Adjust sharpness gradually and test with different content. Use a test pattern to identify ideal sharpness settings. Avoid over-sharpening to prevent halos and noise. Remember that less is often more for natural clarity. Proper calibration ensures your TV displays images as intended for an optimal viewing experience.
Enhancing Image Clarity
Enhancing image clarity involves carefully refining both sharpness and overall picture quality to achieve a more natural and detailed display. To do this, you should adjust your TV’s sharpness setting to avoid artificial edges or overly soft images. Fine-tuning image sharpening helps improve detail without introducing noise or halos. Additionally, focus on color accuracy, ensuring colors appear true to life, which enhances overall clarity. Proper calibration balances sharpness and color, making images crisper and more vibrant without sacrificing realism. Keep in mind, over-sharpening can distort details, so aim for a subtle adjustment. Regularly reviewing content quality can help maintain optimal picture settings. By honing these settings, you’ll enjoy a clearer, more accurate picture that truly reflects the content’s depth and richness.
Setting the Proper Backlight or OLED Light Levels

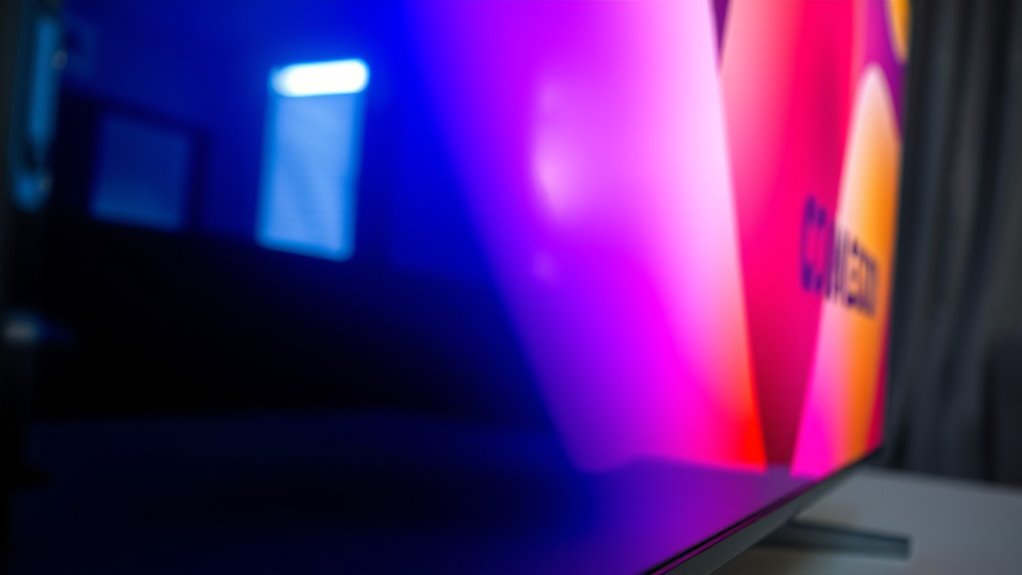
Setting the proper backlight or OLED light levels is essential for achieving ideal picture quality without wasting energy or causing eye strain. Adjusting these levels depends on your ambient lighting and viewing distance. If your room is bright, increase the backlight to maintain contrast; in darker environments, lower it to reduce glare. Keep in mind that a closer viewing distance may require a lower backlight, while a farther distance might need a higher setting. Proper calibration ensures you see vibrant images without discomfort. Additionally, understanding visual comfort principles can help prevent eye fatigue during extended viewing sessions.
Managing Motion Settings for Smooth Playback

To achieve smooth playback, you should adjust your TV’s motion settings, starting with motion interpolation. Fine-tuning blur reduction can also help reduce unwanted artifacts and improve clarity during fast scenes. Experimenting with these options lets you customize motion performance to match your viewing preferences.
Adjust Motion Interpolation
Have you ever noticed that some videos look unnaturally smooth or overly choppy? That’s often due to motion interpolation settings. Adjusting these settings helps manage motion smoothing and judder reduction, making playback appear more natural. You can fine-tune how your TV handles fast-moving scenes, reducing unwanted artifacts or motion blur. Lesser-known spots provide tranquility and privacy, and adjusting motion settings can help you better enjoy these natural visuals. Here’s what to contemplate: – Turn off or lower motion smoothing for a more authentic look – Enable judder reduction to smooth out low-frame-rate content – Use preset modes like “Cinema” or “Game” for specific preferences – Manually customize the interpolation level for ideal balance
Fine-tune Blur Reduction
Fine-tuning blur reduction is essential for achieving smooth, natural motion on your TV. If you notice motion smearing during fast scenes, adjusting the blur reduction setting can help. Too much blur reduction may create a soap opera effect, making motion appear unnatural, while too little leaves you with unwanted motion blur. Start by setting blur reduction to a moderate level and observe the results. If motion still looks smeared or choppy, gradually increase or decrease the setting until motion appears clearer and more lifelike. Remember, the goal is to minimize motion artifacts without introducing artifacts of its own. Fine-tuning this setting ensures your TV delivers smooth, realistic motion, enhancing your viewing experience during sports, action movies, or fast-paced games. Additionally, understanding how to manage motion settings can further improve your picture quality.
Ensuring Proper Aspect Ratio and Screen Size

Making sure the proper aspect ratio and screen size is essential for a satisfying viewing experience. Incorrect settings can distort images, making movies look stretched or squished. To get it right, verify your TV’s aspect ratio matches the content’s format, typically 16:9. Adjust your display settings to prevent black bars or cropping issues. Keep your screen size appropriate for your viewing distance to avoid eye strain and maximize immersion. Using calibration tools can further enhance picture quality and ensure settings are optimized for your specific model. Here are key tips:
- Match your TV’s aspect ratio to the original content
- Use built-in settings or calibration tools for adjustments
- Avoid zooming or stretching options that distort the picture
- Make certain your screen size suits your room and seating distance
Correct aspect ratio and screen size help you enjoy a natural, immersive picture every time.
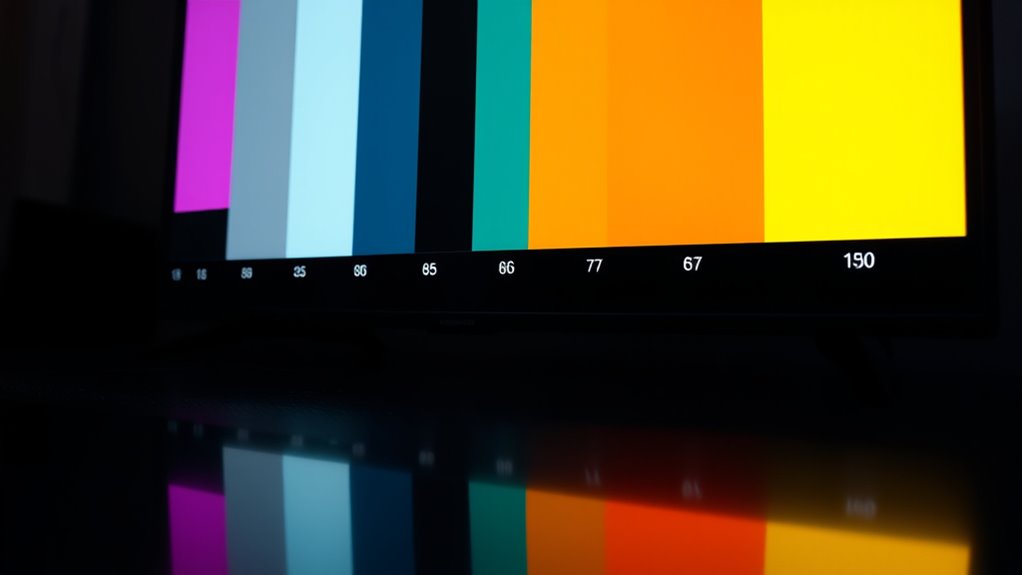
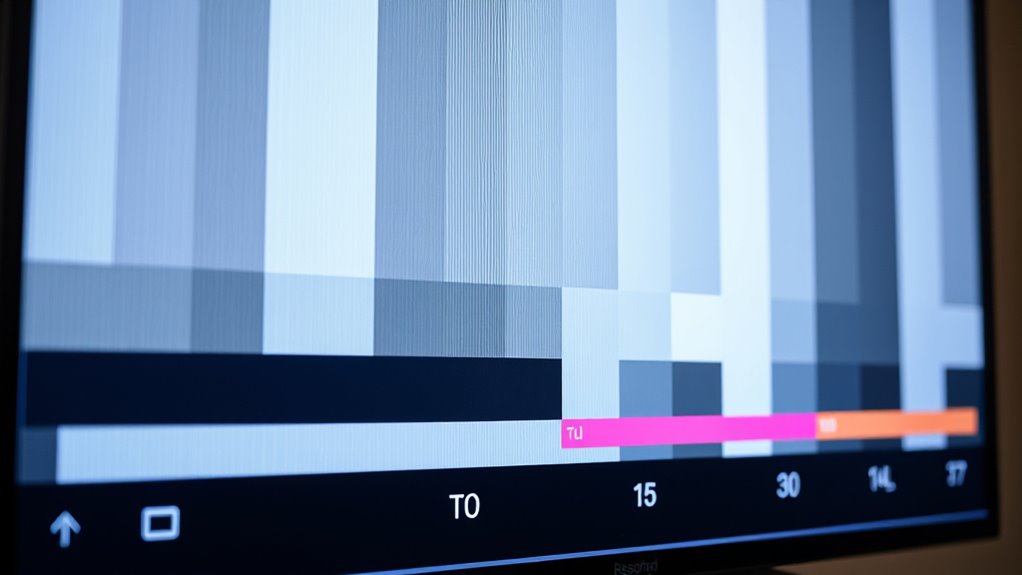
Using Test Patterns and Calibration Discs

Using test patterns and calibration discs is one of the most effective ways to achieve accurate TV calibration. Test pattern sources provide essential visual cues to adjust your picture settings precisely. When selecting a calibration disc, choose one with a variety of test patterns designed for color, contrast, sharpness, and geometry adjustments. Your calibration disc selection should include patterns for checking black levels, white balance, and color accuracy. These discs often come with detailed instructions, making adjustments straightforward. Using a dedicated disc ensures you have consistent, reliable references rather than relying on online images or built-in TV tools alone. Proper use of test patterns helps you fine-tune your display, resulting in a more accurate and enjoyable viewing experience. Incorporating professional calibration tools can further enhance the accuracy of your adjustments.
Saving and Maintaining Your Settings Over Time
After calibrating your TV with test patterns and calibration discs, the next step is to save your settings so they remain consistent over time. Properly saving your calibration profile in the TV’s settings menu guarantees your picture stays accurate, even as ambient lighting changes. To maintain ideal quality, consider these tips:
- Save your calibration profile in the TV’s settings menu.
- Adjust for ambient lighting shifts by recalibrating periodically.
- Use the same viewing environment for consistent results.
- Document your preferred settings for quick restoration if needed.
- Regularly review calibration settings to ensure optimal picture quality over time.
Frequently Asked Questions
How Often Should I Recalibrate My TV for Optimal Picture Quality?
You should recalibrate your TV every 6 to 12 months, depending on your viewing habits and changes in ambient lighting. Calibration frequency varies if you notice the picture quality declining or if you upgrade your settings. If you watch different content types or change your viewing environment often, consider recalibrating more frequently. Regular recalibration ensures peak picture quality, keeping visuals vibrant and accurate for the best viewing experience.
What Are the Common Mistakes to Avoid During Calibration?
Think of calibration as tuning a musical instrument—you don’t want to hit the wrong notes. Avoid calibration pitfalls like incorrect adjustments, which can distort colors or crush shadows. Don’t rush through the process or rely solely on auto settings, as these can lead to uneven picture quality. Instead, follow a steady, deliberate approach, double-check your adjustments, and use proper test patterns to make certain your TV’s picture is perfectly harmonized.
How Do Ambient Lighting Conditions Affect TV Calibration?
Ambient light and screen reflections considerably impact your TV calibration. Too much ambient light makes it hard to see picture details accurately, leading you to set brightness and contrast improperly. Screen reflections can cause glare, washing out colors and reducing contrast. To get the best calibration, you should perform adjustments in a dimly lit room, minimize reflections with curtains or anti-glare screens, and avoid direct light shining on your TV.
Can I Calibrate My TV Without Professional Equipment?
Think of your TV as a canvas; you can paint a perfect picture with DIY calibration. You don’t need professional equipment—simple calibration tools like free apps or basic color settings can make a big difference. By adjusting contrast, brightness, and color manually, you enhance your viewing experience. Just take your time, follow guides, and treat your TV like a masterpiece, fine-tuning it to match your ideal picture.
Are There Specific Settings for Different Types of Content Like Sports or Movies?
Yes, you should adjust content specific settings and viewing modes for different types of content. For sports, switch to a sports mode with enhanced motion and brightness for faster action. For movies, choose cinema or movie mode for accurate colors and softer contrast. Regularly tweak viewing mode adjustments to optimize picture quality based on what you’re watching, ensuring an immersive experience tailored to each content type.
Conclusion
Think of your TV as a window to your world—clear, true, and vibrant. When you calibrate it properly, you’re sharpening the glass through which you see your favorite moments. With each setting perfected, you invite a richer, more immersive experience that feels as if the scene is spilling out into your room. Keep your adjustments steady, like a steady hand guiding the lens, and enjoy a picture that reflects the true beauty behind every frame.