To install a smart thermostat, start by gathering the necessary tools and turning off power to your HVAC system for safety. Remove the old thermostat, then carefully label and disconnect the wires. Mount the new system’s plate, connect the wires securely, and attach the thermostat. Power on your system and follow the prompts to connect it to Wi-Fi and complete the setup. If you follow these steps, you’ll optimize your home’s comfort—more details follow.
Key Takeaways
- Verify compatibility of the smart thermostat with your HVAC system before starting.
- Turn off power and carefully remove the old thermostat, noting wiring connections for reference.
- Mount the new thermostat securely and connect wires according to color-coded terminals.
- Power on the system, connect the thermostat to Wi-Fi, and follow setup prompts for configuration.
- Test the thermostat’s functions, including temperature control, app access, and voice commands.

DREO Space Heater, Portable Electric Heaters for Indoor Use with Thermostat and Remote, 2024 Upgraded, Digital Display, 12H Timer, 5 Mode, 1500W PTC Ceramic Fast Safety Heat for Office Bedroom Home
Powerful heat that fits everywhere: DREO space heaters for indoor combines Hyperamics 1500W advanced PTC system with a...
As an affiliate, we earn on qualifying purchases.
Gather Necessary Tools and Materials
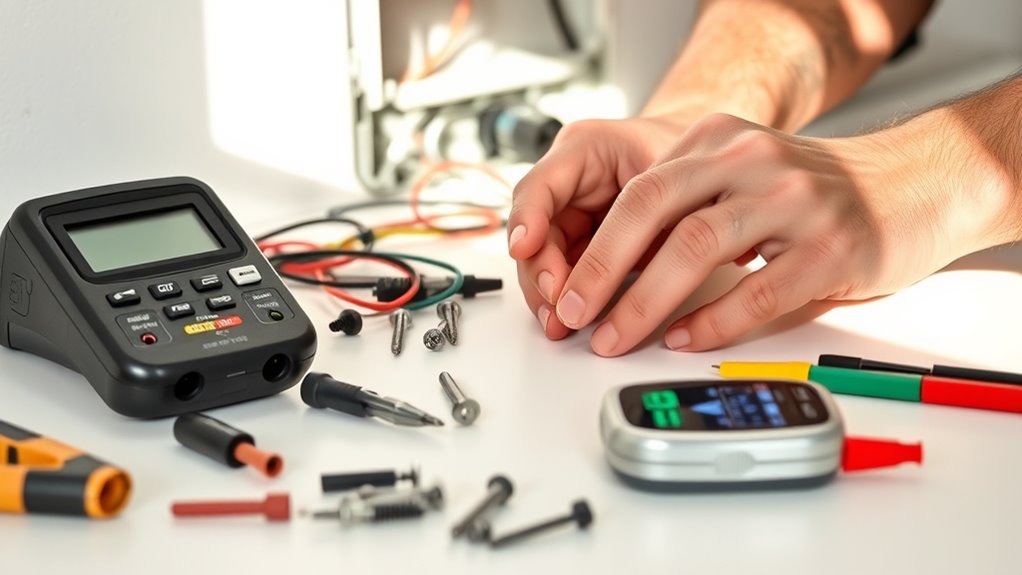
Before beginning the installation, you should gather all the necessary tools and materials to guarantee a smooth process. First, verify you have a compatible smart thermostat, along with a screwdriver, wire strippers, and a voltage tester. You’ll also need a stable Wi-Fi connection for wireless connectivity, which is essential for the thermostat’s setup and remote control features. Keep a ladder nearby if your thermostat is installed high on a wall. Don’t forget the user interface—many smart thermostats have touchscreens or app-based controls, so familiarize yourself with the app beforehand. Having all these tools and materials ready helps avoid interruptions, making the installation quicker and more efficient. With everything in place, you’ll be set to connect your new thermostat seamlessly.

Caframo True North Heater. Low Profile, Quiet, Powerful Heater for Work and Home. Black, 11.25" x 8" x 5" (9206CABBX)
This rugged electric heater with built-in adjustable thermostat keeps the room warm on the chilliest nights. The True...
As an affiliate, we earn on qualifying purchases.
Turn Off Power to Your HVAC System
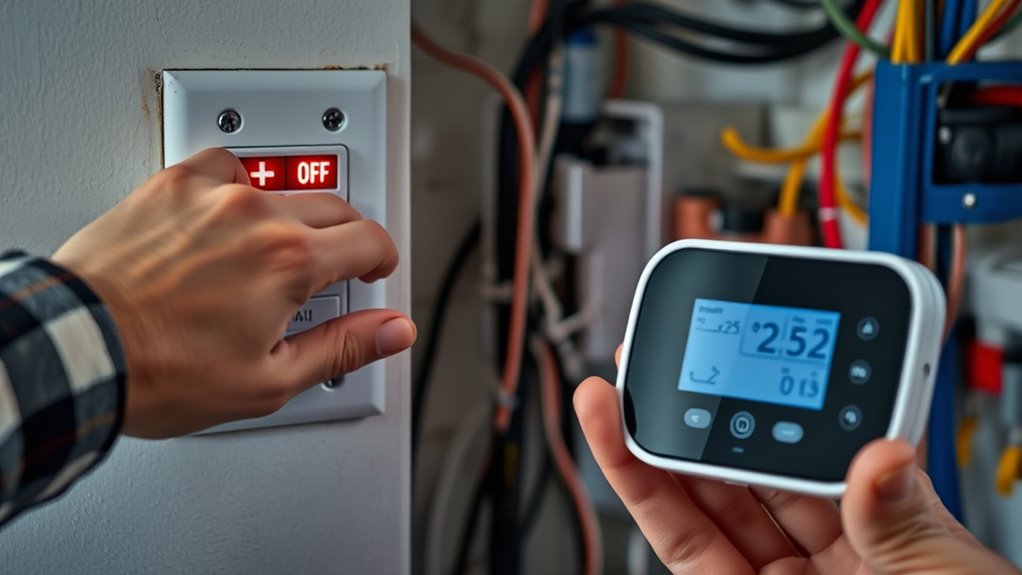
Before starting, locate the main power switch for your HVAC system and turn it off. Next, flip the circuit breaker dedicated to your system to cut all power. Finally, double-check that the power is truly off before proceeding. It is also advisable to verify system safety through proper testing to ensure no residual electricity remains.
Locate Main Power Switch
To safely work on your smart thermostat installation, you need to locate and turn off the main power switch for your HVAC system. Start by finding the circuit breaker or switch that controls power to your system. Here’s what to look for:
- A labeled circuit breaker in your main electrical panel.
- A dedicated switch near your furnace or air handler.
- A power outlet connected to your HVAC equipment, if applicable.
- Any external switch mounted on the wall close to your system.
Ensure the switch is turned off completely. Remember, never rely solely on the power outlet; always verify the circuit breaker controls power to your HVAC. Taking these steps prevents electrical accidents during installation.
Turn Off Circuit Breaker
Turning off the circuit breaker is an essential step to guarantee your safety during the smart thermostat installation. It prevents electrical shocks and protects your home’s insulation system from accidental damage. Before proceeding, identify the correct breaker using labels or your knowledge of the circuit layout. Be aware of different circuit breaker types, such as single-pole or double-pole, which control various parts of your HVAC system. Use the table below to help clarify your options:
| Circuit Breaker Type | Controlled System | Location Tips |
|---|---|---|
| Single-pole | HVAC or thermostat | Usually in the main panel |
| Double-pole | Whole HVAC system | Larger switch, dual handle |
| GFCI or AFCI | Specialized circuits | Near outdoor or special outlets |
Always ensure power is off before touching wiring. Additionally, understanding signs of spoilage in your home appliances can help prevent electrical issues related to faulty wiring or damaged components.
Confirm Power Is Off
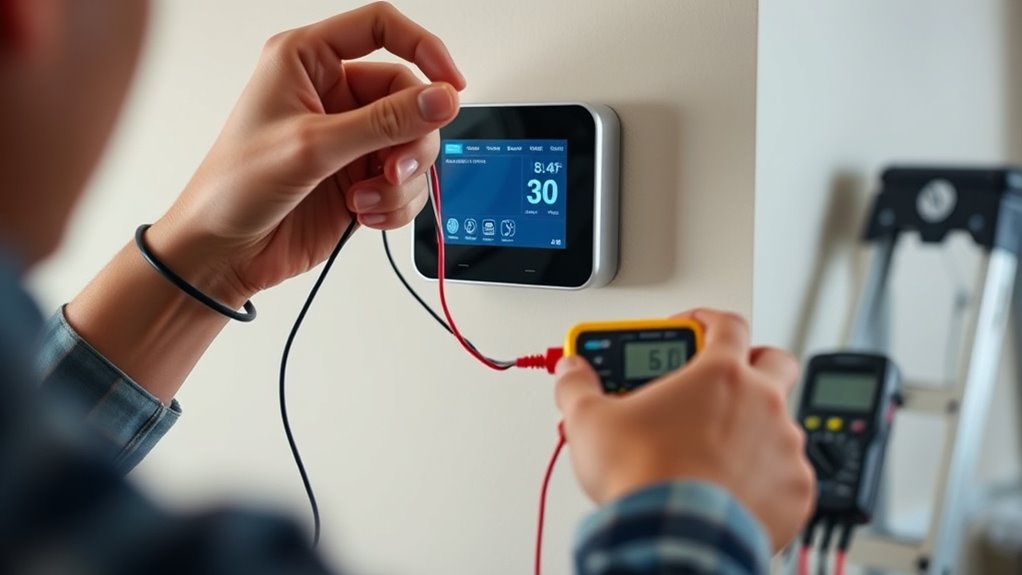
After locating the correct circuit breaker and switching it off, verify that the power to your HVAC system is completely disconnected. This step is vital to prevent electrical shock and ensure safety during installation. To confirm:
- Check the thermostat display; it should be blank or off.
- Attempt to turn on your HVAC system; no response indicates power is off.
- Use a voltage tester on the system wires to verify no current flows.
- Consult your HVAC manual for specific instructions related to your system’s power shutoff.
- Remember that safety precautions are essential when working with electrical components to prevent accidents and injuries.
Ensuring power is fully off protects your warranty coverage and helps avoid compatibility check issues later. Always double-check before proceeding to prevent damage or injury.

450W Mini Space Heater With Temperature Detection, Remote Wall Outlet Electric Space Heater as Seen on TV with Adjustable Thermostat and Timer and Led Display, Compact for Office Room RV (Smart-White)
[Low wattage space heater with Remote Control]: 500W watt, 110 volt, 2.9 amps, 60Hz, Convenient 180 rotating plug...
As an affiliate, we earn on qualifying purchases.
Remove the Old Thermostat
First, make sure the power is completely off to avoid any risk. Then, carefully detach the existing thermostat from the wall, noting how the wires are connected. This step prepares you to install your new smart thermostat safely and correctly.
Turn Off Power
Before removing the old thermostat, it’s vital to turn off the power to your heating and cooling system to guarantee safety. This step prevents electrical shock and protects your system’s components. To do this effectively:
- Locate your circuit breaker or fuse box.
- Switch off the breaker controlling your HVAC system.
- Confirm power is off by trying to adjust the thermostat; it should be unresponsive.
- Ensure your new thermostat’s compatibility with your system’s wiring and wireless connectivity features.
- Performing a quick system check can help verify that the power is fully disconnected before proceeding.
Turning off power is essential for safely disconnecting the old thermostat and verifying that it’s compatible with your existing setup, especially when considering modern features like wireless connectivity. This step ensures a safe, smooth installation process.
Detach Existing Unit
Are you ready to remove the old thermostat? First, take a close look at the wiring. Make certain you understand wire compatibility to avoid damaging your system. Carefully label each wire with tape or take a photo for reference. Next, unscrew the thermostat from its placement on the wall. Gently pull it away, exposing the wires connected behind it. Be cautious not to yank or pull too hard. Check if the existing thermostat placement aligns with your new smart thermostat’s requirements; you might need to adjust its position later. Once the wires are free, disconnect them from the old unit, making sure not to bend or break any. This step is vital for a smooth transition to your new thermostat. Additionally, reviewing the Kia Tuning options can help you optimize your vehicle’s performance after the installation.

GiveBest Portable Electric Space Heater with Thermostat, 1500W/750W Safe and Quiet Ceramic Heater Fan, Heat Up 200 Square Feet for Office Room Desk Indoor Use, Silver
2 in 1 heater fan: This ceramic heater offers dual heating modes (1500W/750W) plus a cool air fan,...
As an affiliate, we earn on qualifying purchases.
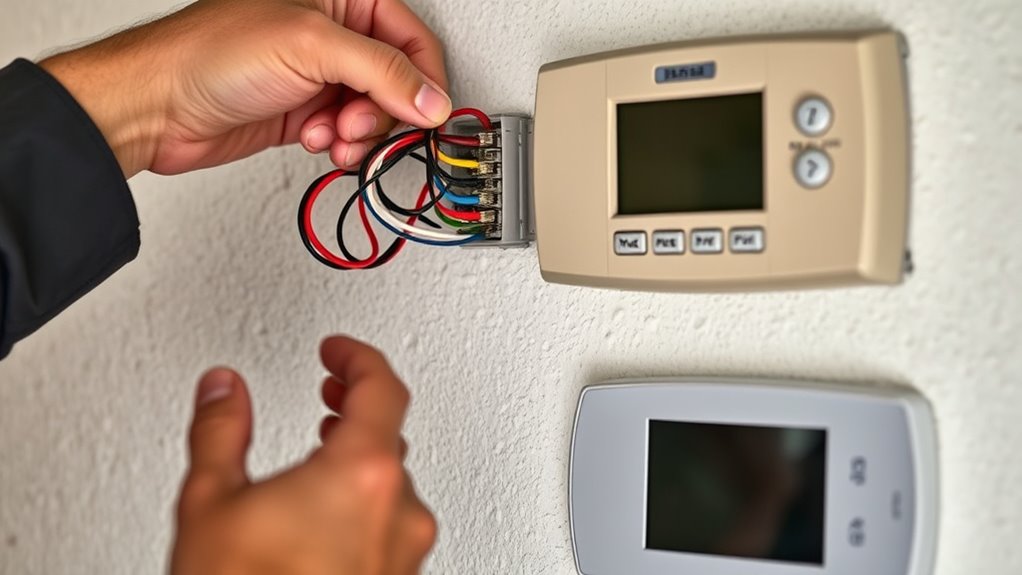
Identify and Label Wires
To guarantee a smooth installation process, you need to accurately identify and label each wire connected to your existing thermostat. Start by examining each wire and noting its wire color coding, which often indicates its function. Use a terminal identification guide to match wires to their labels, such as R, C, W, or Y. As you inspect, keep these points in mind:
Label and photograph each wire carefully to ensure a smooth thermostat installation.
- Check the wire color and compare it to the terminal labels.
- Gently loosen each wire from its terminal.
- Use masking tape or labels to mark each wire with its terminal function.
- Take a photo for reference before disconnecting all wires.
Additionally, understanding the integration of AI in mobile devices can help in choosing a smart thermostat with advanced features like real-time diagnostics and remote control. This ensures correct connections later and avoids confusion during installation. Proper wire identification is key for a safe, efficient upgrade.
Install the Mounting Plate and Connect Wires
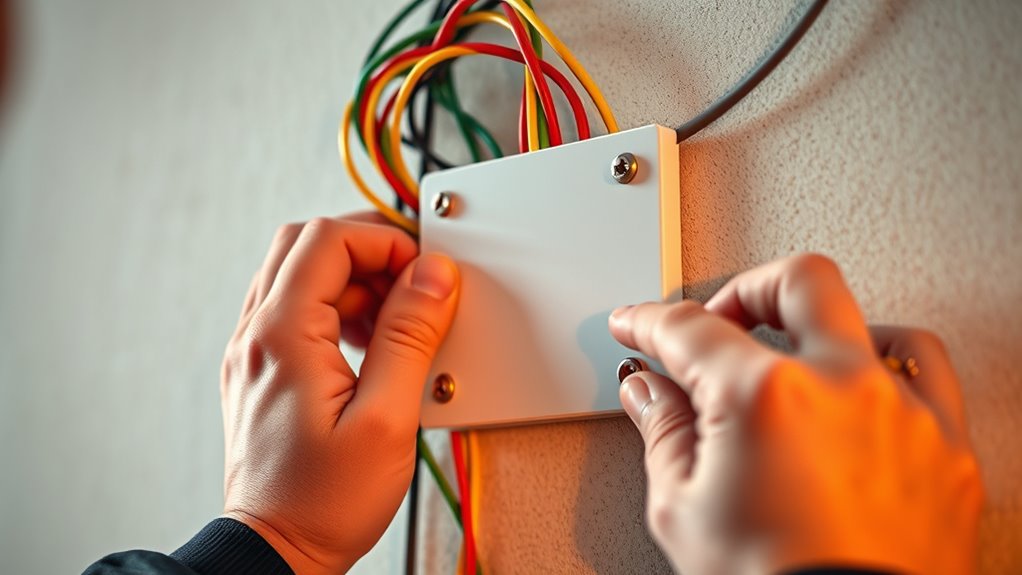
Begin by positioning the mounting plate on the wall, ensuring it’s level and aligned with your desired thermostat placement. Use the mounting hardware provided to secure it firmly to the wall. Before connecting wires, consult the wire color codes: for example, red typically indicates power (R), white is for heat (W), and yellow controls the cooling (Y). Carefully strip the wire ends if needed, and connect each wire to the corresponding terminal on the mounting plate. Make sure each connection is secure to prevent loose contacts. Double-check that the wires are properly matched to the color codes and firmly inserted into their terminals. Once all wires are connected and the mounting plate is securely attached, you’re ready for the next step in installing your smart thermostat. Proper understanding of toilet flushing mechanisms can help prevent issues during maintenance or upgrades.
Attach the Smart Thermostat to the Mounting Plate
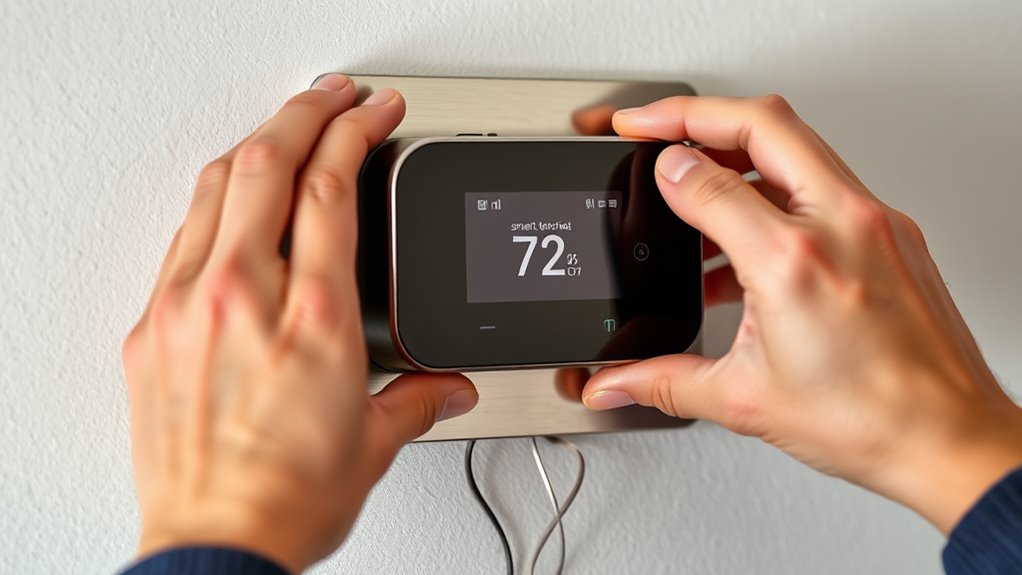
Once the mounting plate is securely attached, you can proceed to attach the smart thermostat itself. First, ensure the wire connections are correctly aligned with the thermostat’s terminals. Next, follow these mounting techniques:
Secure the thermostat firmly, ensuring wires are neat and properly connected for reliable operation.
- Line up the thermostat’s hooks or slots with the mounting plate.
- Gently press the thermostat against the plate until it clicks into place.
- Confirm that the wires are neatly tucked and not pinched.
- Secure the thermostat with screws if necessary to prevent movement.
Make sure the wire connection is firm and that no wires are loose. Proper mounting techniques ensure the thermostat stays stable and functions correctly, setting the stage for reliable operation once you power on your HVAC system. Proper installation is essential for ensuring safety and optimal performance.
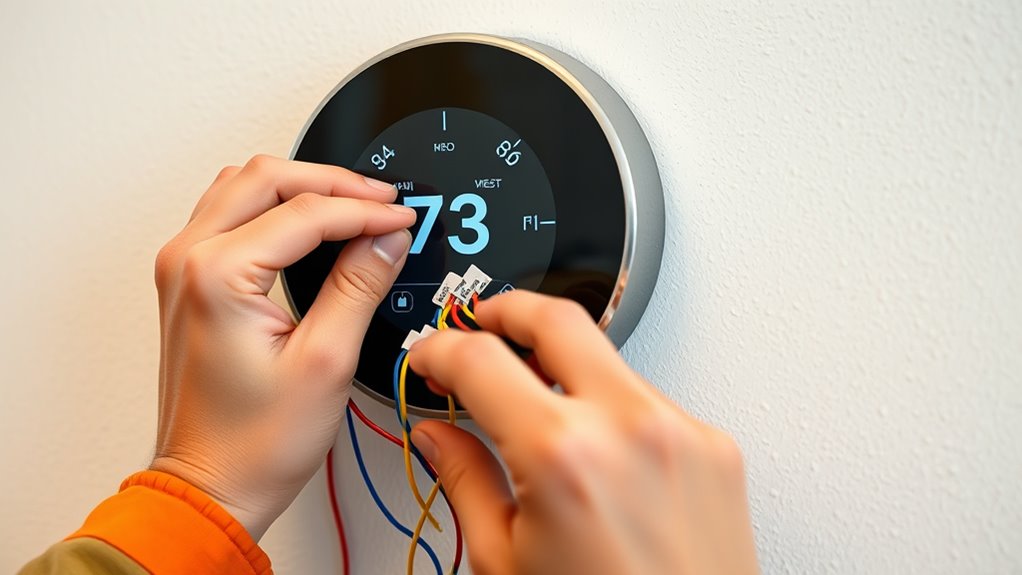
Power On Your HVAC System and Configure the Thermostat
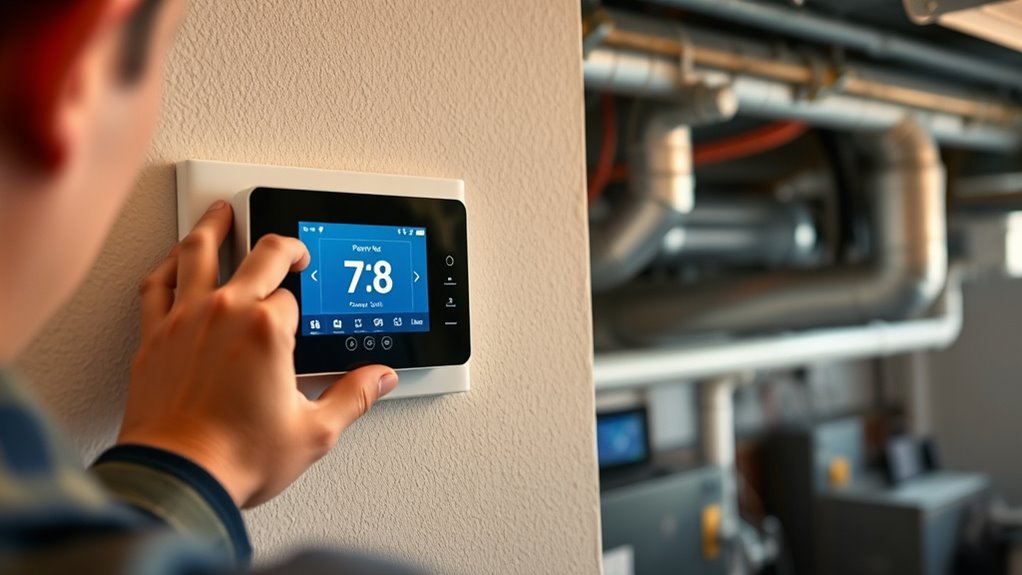
After ensuring your thermostat is securely mounted and wired correctly, you should power on your HVAC system to start the setup process. Once it’s on, your smart thermostat will establish wireless communication with your home network, allowing for remote control and updates. Begin by browsing through the initial prompts on the thermostat’s display, which may include connecting to Wi-Fi and creating an account. Next, perform temperature calibration if needed, ensuring the thermostat reads accurately. Passive voice detection can help identify and correct any passive constructions in your settings or instructions. Accurate temperature sensing is essential for optimal comfort and energy savings. Follow the on-screen instructions to complete these steps. Once configured, your thermostat will be ready to communicate seamlessly with your HVAC system, setting the stage for further customization and control.
Complete Setup and Test Your New Smart Thermostat
To guarantee your smart thermostat is working correctly, you need to complete the setup process and run a thorough test. First, connect your thermostat to Wi Fi connectivity to ensure remote control and updates. Next, adjust the temperature settings to see if the device responds promptly. Then, test voice control by giving commands through your smart speaker, like “Set the temperature to 72 degrees.” Finally, verify the app on your phone can control the thermostat, confirming seamless integration. Additionally, ensure your device’s compatibility with other smart home devices allows for smooth automation and integration within your existing system. With these steps, you confirm the thermostat’s Wi Fi connectivity, voice control, and overall functionality. Doing so certifies your system operates smoothly, providing comfort and convenience at your command.
Frequently Asked Questions
Can I Install a Smart Thermostat Myself Without Professional Help?
Yes, you can do a DIY installation of a smart thermostat if you’re comfortable with basic wiring and electrical work. Follow the manufacturer’s instructions carefully, and verify your current system is compatible. However, if you’re unsure or encounter complex wiring, it’s wise to seek professional assistance. This ensures safety and proper setup, avoiding potential damage or malfunctions. When in doubt, professional help guarantees a smooth, hassle-free installation process.
Will Installing a Smart Thermostat Affect My Existing HVAC Warranty?
Installing a smart thermostat doesn’t automatically void your HVAC warranty, but warranty implications depend on installation considerations. If you follow the manufacturer’s instructions carefully and use compatible equipment, you’re less likely to face issues. However, some warranties might require professional installation for coverage to remain valid. To be safe, check your warranty details and consult your HVAC provider before installing. Proper installation guarantees your system stays protected and functions efficiently.
What Should I Do if Wires Are Different Colors Than Instructions?
If you encounter a wire color mismatch during your installation, don’t panic. First, consult the wiring diagram clarification in your thermostat’s manual to identify each wire’s function. Use a multimeter if needed to verify voltages. If wiring colors don’t match the diagram, rely on the wire’s purpose rather than color. If unsure, consider contacting a professional to avoid incorrect wiring and potential damage.
How Do I Troubleshoot Connectivity Issues After Installation?
If you’re having connectivity issues after installation, first check your wireless connectivity by ensuring your Wi-Fi signal is strong and stable near the thermostat. Move your router closer if needed. Reduce signal interference by minimizing obstacles like thick walls or electronic devices that can disrupt the connection. Restart your thermostat and router, then reconnect. Updating firmware and resetting the device can also improve wireless connectivity and resolve persistent issues.
Is There a Specific Smart Thermostat Compatible With My HVAC System?
You should check your HVAC compatibility first, as not all smart thermostat options work with every system. Look for models that specify compatibility with your HVAC type, whether it’s a standard, heat pump, or multi-stage system. Popular options like Nest, Ecobee, and Honeywell often list compatible systems on their websites. Confirm your system details and choose a smart thermostat that matches those specifications for seamless integration and reliable performance.
Conclusion
With your new smart thermostat in place, you’re now the captain steering your home’s comfort through calm seas and storms alike. Like a lighthouse guiding ships safely home, your device illuminates your space with perfect temperature control. Embrace this journey of mastery over your environment, knowing each tap and tap completes a voyage towards cozy, efficient living. Your home’s comfort is now a beacon you control—bright, steady, and ready to shine.