This guide helps educators and parents choose and utilize science kits effectively for students. It covers selecting appropriate kits, preparing materials, and conducting experiments to maximize learning and engagement. Suitable for those with basic science knowledge, this process ensures a safe and productive experience.

EUDAX School Physics Labs Basic Electricity Discovery Circuit and Magnetism Experiment Kits for High School Students
- ✔ Items for Electricity: 56
- ✔ Items for Magnetism: 21
- ✔ Repair Tools: 2 pcs
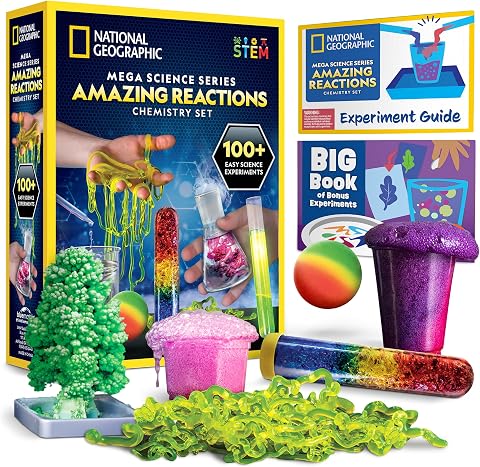
National Geographic Amazing Chemistry Set – STEM Kit with 100+ Experiments for Kids
- ✔ Number of experiments: 100+
- ✔ Includes: Test tubes, beakers, pipettes
- ✔ Bonus experiments: 85
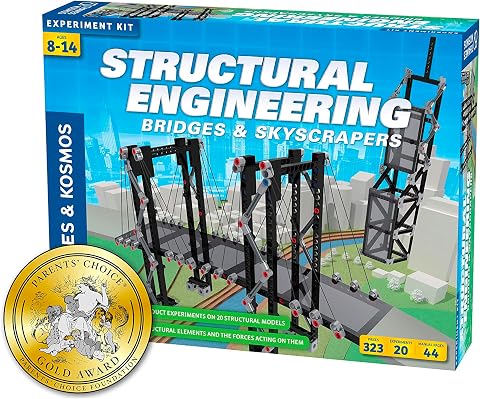
Thames & Kosmos Structural Engineering: Bridges & Skyscrapers Science & Engineering Kit
- ✔ Number of models: 20
- ✔ Pieces: 285+
- ✔ Manual pages: 36
Difficulty: Intermediate | Time: 30-45 minutes for selection and setup, ongoing for use
What You’ll Need
Tools & Materials:
- Basic safety gear (gloves, goggles)
- Notebook or recording sheets
- Access to a clean workspace
Knowledge:
- Basic understanding of scientific concepts
- Ability to supervise experiments safely
Verify the age recommendations and safety warnings on the kit. Ensure workspace is well-ventilated and free of clutter.
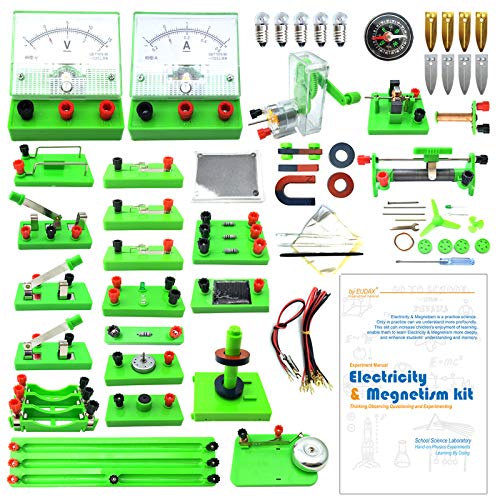
EUDAX School Physics Labs Basic Electricity Discovery Circuit and Magnetism Experiment Kits for High School Students Electromagnetism Elementary Electronics
Learn basic Electricity and Magnetism experiments through full-color manuals, understand the basic principles, and help Students learn, think...
As an affiliate, we earn on qualifying purchases.
EUDAX School Physics Labs Basic Electricity Discovery Circuit and Magnetism Experiment Kits for High School Students
This kit stands out for its thorough coverage of electricity and magnetism concepts through practical experiments. Compared with the other options, it offers a broader array of components—56 items for electricity and 21 for magnetism—making it ideal for students who want a deep dive into physics. However, the extensive component list can feel overwhelming for beginners, and batteries are not included, adding an extra step for setup. It’s best suited for high school students with some foundational knowledge or those eager to experiment extensively with STEM principles.
Pros:
- Comprehensive set with diverse components for electricity and magnetism
- Detailed manual suitable for high school learners
- Encourages exploration and deep understanding of STEM concepts
Cons:
- Batteries not included, additional purchase needed
- Component volume may be overwhelming for beginners
- Designed strictly for educational use, not a toy
Best for: High school students interested in physics and hands-on experimentation
Not ideal for: Younger children or those seeking simple, quick experiments
Bottom line: This kit offers the most comprehensive physics experience for high school students ready for detailed experimentation.
“This kit offers the most comprehensive physics experience for high school students ready for detailed experimentation.”

National Geographic Amazing Chemistry Set with 100+ Experiments Ages 8-12
OVER 100 EXCITING EXPERIMENTS - The science experiments in this kit let kids explore the wonders of hands-on...
As an affiliate, we earn on qualifying purchases.
National Geographic Amazing Chemistry Set – STEM Kit with 100+ Experiments for Kids
Compared with physics kits, this chemistry set emphasizes creativity and variety, offering over 100 experiments with real tools like test tubes, beakers, and pipettes. The inclusion of 85 bonus experiments extends its educational value, making it highly engaging for younger students or beginners. Its main advantage is the wide range of experiments, fostering curiosity and hands-on learning. Nonetheless, it requires adult supervision for younger users, and some experiments need household items not included in the kit, which could pose challenges for complete beginners lacking additional resources.
Pros:
- Huge variety of experiments—over 100 plus bonus content
- Real scientific tools for authentic experiments
- Encourages curiosity and creativity in science learning
Cons:
- Requires adult supervision for safety
- Some experiments depend on household items not included
- Limited age range info, potentially better suited for younger children
Best for: Kids and beginners eager to explore colorful and chemical reactions
Not ideal for: Older students seeking advanced physics or engineering projects
Bottom line: A versatile and engaging chemistry kit perfect for sparking curiosity in young science enthusiasts.
“A versatile and engaging chemistry kit perfect for sparking curiosity in young science enthusiasts.”

Thames & Kosmos | Structural Engineering: Bridges & Skyscrapers | Science & Engineering Kit | Build 20 Models | Learn about Force, Load, Compression, Tension | Parents' Choice Gold Award Winner, Blue
Build 20 different models that each teach about force, load, compression, tension and more
As an affiliate, we earn on qualifying purchases.
Thames & Kosmos Structural Engineering: Bridges & Skyscrapers Science & Engineering Kit
This kit is tailored for students interested in engineering principles, allowing the construction of 20 different models that demonstrate force, load, tension, and compression. With over 285 interchangeable pieces and a detailed 36-page manual, it offers a deep, hands-on experience in structural engineering. Compared to the physics and chemistry kits, it focuses more narrowly on model building and mechanics, making it ideal for students with some prior knowledge or intermediate skills. Its limited scope might be less appealing to those seeking broad scientific experimentation outside structural design.
Pros:
- Rich in interchangeable parts for versatile models
- Educational focus on force, load, and structural concepts
- Award-winning design with engaging manual
Cons:
- Requires intermediate skill level
- Limited to structural engineering themes
- Less suitable for complete beginners
Best for: Students interested in engineering, mechanics, and model building
Not ideal for: Beginners or younger children without experience in model construction
Bottom line: Ideal for students who want a focused, hands-on engineering experience with multiple model-building options.
“Ideal for students who want a focused, hands-on engineering experience with multiple model-building options.”
As an Amazon Associate we earn from qualifying purchases.
Before You Start
Read all instructions and safety warnings provided with the kit. Gather all tools and materials before beginning. Confirm that students understand safety protocols.
Step-by-Step Instructions
Step 1: Select an appropriate science kit
Review the age range, scientific focus, and complexity of available kits. Choose one aligned with students’ grade level and curriculum goals.
Tip:Opt for kits with clear instructions and adequate safety features. Check reviews or recommendations from trusted sources.
Check: The selected kit is suitable, complete, and safe for the intended students, with all components accounted for.
Step 2: Prepare the workspace and gather safety equipment
Set up a clean, flat workspace in a well-ventilated area. Gather safety goggles, gloves, and any other protective gear recommended.
Tip:Keep a first aid kit nearby in case of accidents. Ensure students understand safety procedures before starting.
Check: Workspace is organized, safety gear is accessible, and students are briefed on safety protocols.
Step 3: Review the experiment instructions and safety guidelines
Read through the experiment manual carefully. Highlight key safety points and steps to ensure understanding.
Tip:Discuss potential hazards with students and clarify any doubts before proceeding.
Check: You and the students fully understand the procedure and safety instructions.
Step 4: Set up the experiment components
Lay out all materials and components as per the instructions. Verify that all parts are available and in good condition.
Tip:Organize items in order of use to streamline the experiment process.
Check: Materials are ready and correctly arranged, with no missing or damaged parts.
Step 5: Conduct the experiment step-by-step
Follow the manual precisely, performing each step carefully. Supervise students closely, offering guidance as needed.
Tip:Encourage students to record observations and ask questions during the process.
Check: Experiment is completed according to instructions, with observations and data recorded accurately.
Step 6: Analyze results and discuss findings
Help students interpret their data and relate outcomes to scientific concepts. Facilitate discussion to reinforce learning.
Tip:Use visual aids or additional resources if necessary to clarify concepts.
Check: Students can explain their observations and understand the scientific principles demonstrated.
Step 7: Clean up and store materials properly
Wash and dry reusable components. Dispose of waste according to safety guidelines. Store remaining materials securely.
Tip:Establish a routine cleanup process to maintain kit longevity and safety.
Check: Work area is tidy, and materials are stored correctly, ready for future use.
Common Mistakes to Avoid
- Using incompatible or damaged components —
Always check the condition of parts before starting. Do not use damaged items or those not specified in the manual.
- Not following safety precautions —
Always wear safety gear and supervise students closely. Read safety instructions thoroughly before beginning.
- Skipping steps or rushing through procedures —
Follow each step carefully and take time to understand each part of the experiment. Pause if clarification is needed.
- Poor cleanup leading to hazards or damage —
Allocate time for cleanup and instruct students on proper disposal and storage practices.
Troubleshooting
Problem: Experiments not producing expected results
Solution:
Double-check all steps, verify measurements, and ensure materials are correct and in good condition.
Problem: Safety gear not fitting properly
Solution:
Use adjustable or appropriate-sized safety equipment. Ensure all students wear gear correctly before starting.
Problem: Missing components or supplies
Solution:
Verify kit contents before starting. Contact supplier for replacements if necessary, or substitute with compatible items if safe.
What Success Looks Like
Students complete the experiment successfully, observe correct phenomena, record accurate data, and demonstrate understanding of the scientific concepts involved.
Next Steps
Review the experiment outcomes with students, plan follow-up activities, and store kits properly for future use. Consider trying more complex experiments or custom projects to deepen understanding.
Frequently Asked Questions
How do I choose the right science kit for my students?
Select kits based on the students’ age, curriculum goals, safety features, and reviews. Match the complexity to their skill level.
What safety precautions are essential when using science kits?
Always wear protective gear, supervise students closely, read all instructions thoroughly, and ensure proper disposal of materials.
How can I extend learning after the experiment?
Encourage students to write reports, perform related activities, or design their own experiments based on what they learned.