
TL;DR
Acoustic dampening is about controlling reflections and sound leaks, not just stuffing foam. Placement matters—distance, barriers, and ventilation are your best tools for a quiet, professional closet booth. Seal gaps, add absorption, and ensure airflow for a perfect setup.
Imagine screaming into a pillow—sounds muffled, distant, and way less harsh. That’s what good acoustic treatment does: it makes your voice clearer and your space quieter. But the truth is, the biggest noise reductions come not from fancy foam but from smart placement and sealing gaps.
If you’ve ever tried recording in a tiny closet, you know the challenge: echo, sound leaks, and heat buildup. This guide shows how to tame the noise with simple tricks and clever setup. Whether you’re turning a closet into a voice booth or just want your workspace to stay silent, understanding the core principles makes all the difference.
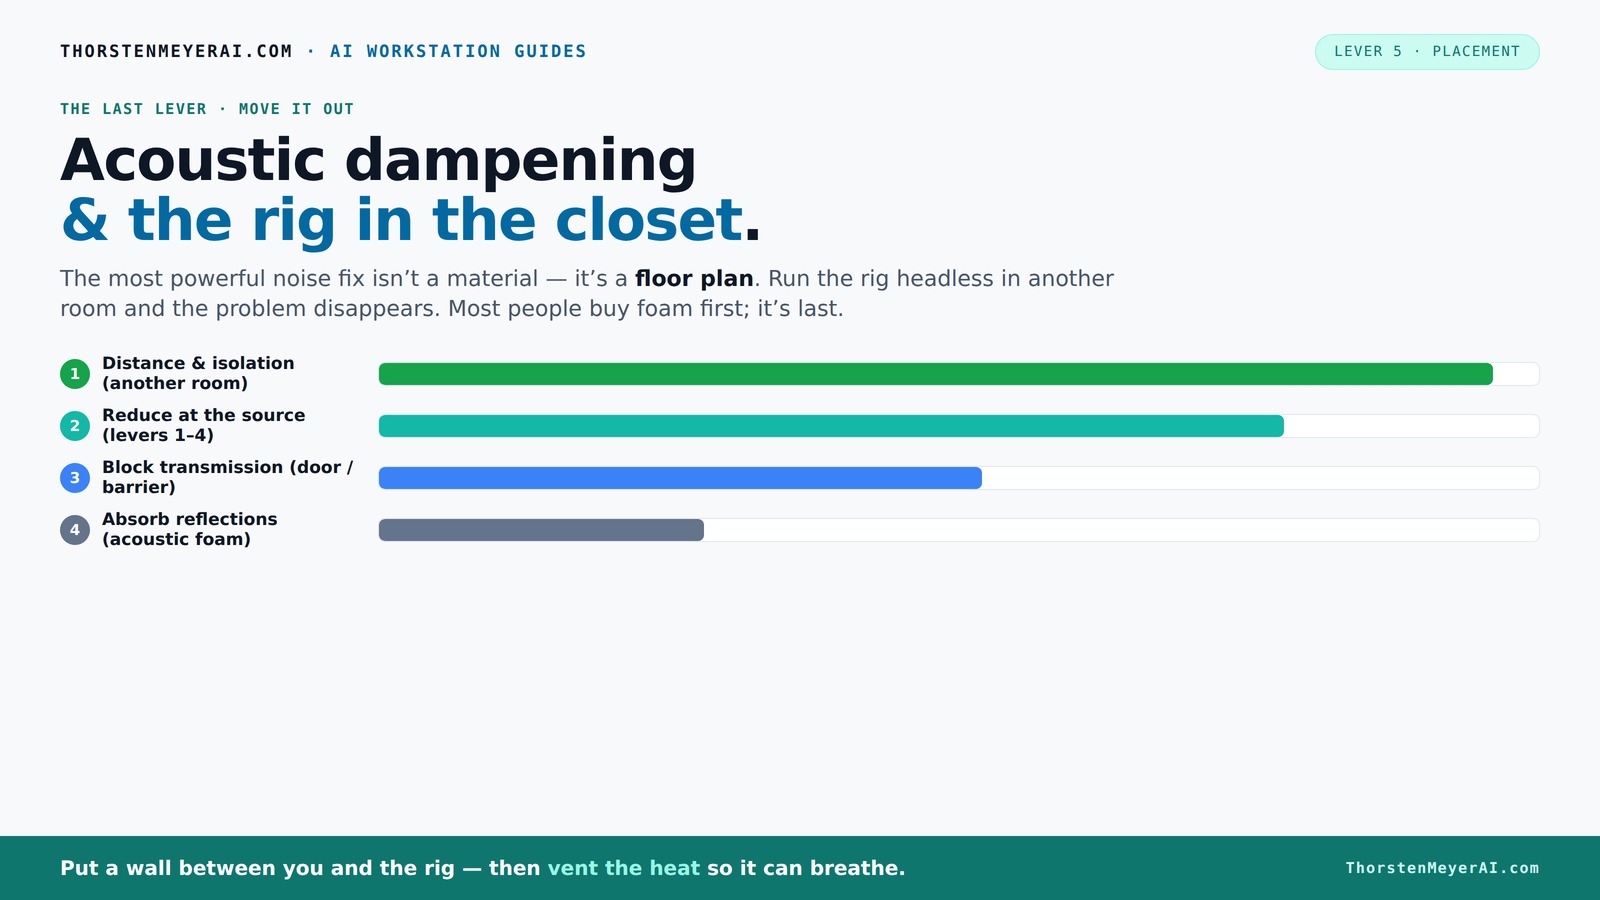
Acoustic dampening
& the rig in the closet.
The most powerful noise fix isn’t a material — it’s a floor plan. A rig you can’t hear because it’s in another room beats any amount of foam. Tap the approaches in Part 1 to see what actually works.
(another room)
(levers 1–4)
(door / barrier)
(acoustic foam)
Contain the noise, not the heat
Key Takeaways
- Distance your rig from your workspace whenever possible to eliminate most noise issues.
- Ventilate any closet or sealed space to prevent heat buildup and maintain performance.
- Seal gaps and cracks thoroughly before adding absorption to reduce sound leaks effectively.
- Acoustic foam helps with reflections but isn’t enough alone—combine with sealing for true soundproofing.
- Treat reflection points around the mic, including walls behind and beside, for clearer recordings.

Focusound 52 Pack Acoustic Foam Panels 1" x 12" x 12" Sound Proof Foam Panles Soundproofing Noise Cancelling Wedge Panels for Home Office Recoding Studio with 300PCS Double-Side Adhesive
Soundproofing - Acoustic foam panels triangular grooves structure for better noise absorption, helps to reduce and absorb unwanted...
As an affiliate, we earn on qualifying purchases.
As an affiliate, we earn on qualifying purchases.
Why Distance and Isolation Are the Biggest Noise Fighters
The most effective way to quiet your rig? Move it far away from your ears. Think of it like a loud neighbor—if you can't hear the noise, it doesn’t bother you. Placing your AI workstation in another room, basement, or closet means the sound waves never reach your workspace.
For example, a researcher kept her GPU rig in a detached garage. She accessed it via SSH, and her office stayed silent, even though the machine roared. This simple step saves money and effort compared to endless foam and barriers.
Remember: a network connection and ventilation are key. Without proper airflow, a closet becomes a heat trap that throttles your rig, reducing performance and risking damage.

54 Pack Sound Proof Foam Panels |12"×12"×1" Quick-Recovery Soundproof Wall Panels | High Density Sound Dampening Panels for Home Studio |With Adhesive Stickers 270PCS
Superior Acoustic Treatment: These sound-absorbing foam panels effectively dampen echoes and reverberations for enhanced audio clarity and quality
As an affiliate, we earn on qualifying purchases.
As an affiliate, we earn on qualifying purchases.
The 'Rig in the Closet' — Why It Works and What to Watch Out For
Placing a noisy, heat-generating machine inside a closet is a smart idea—if you make sure it can breathe. Sealing a space traps heat, which causes fans to spin faster, making more noise. That’s the trap many fall into. For tips on managing acoustic treatment, see this guide on acoustic setup.
To avoid overheating, add ventilation—passive vents or a quiet exhaust fan. For instance, a creator used a ducted fan system with a programmable thermostat to keep his closet cool and silent. This way, the rig runs smooth, and noise stays down. Learn more about proper acoustic treatment and ventilation.
Proper airflow not only prevents overheating but also helps maintain consistent performance. Without adequate ventilation, the heat buildup can cause thermal throttling, which reduces your system's efficiency and can even damage components over time. Balancing noise reduction with effective cooling is a tradeoff—quiet fans and passive cooling methods tend to be less efficient but produce less noise, while active cooling needs careful design to minimize sound.
For detailed setup tips, check out this guide on [reducing heat and noise in AI workstations](https://thorstenmeyerai.com/reduce-heat-noise-ai-workstation/). Proper airflow keeps the heat out and the noise in check.

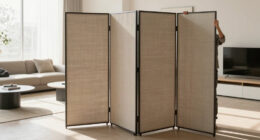
72in 3-Panel Soundproof Room Divider with Wheels, Heavy-Duty Acoustic Partition Temporary Wall for Noise Reduction, Portable Divider for Home Hospital Library Classroom - Light Grey
【Noise Reduction】Our room divider can absorb at least 85% of the noise, creating a quiet environment without being...
As an affiliate, we earn on qualifying purchases.
As an affiliate, we earn on qualifying purchases.
How to Treat a Closet for Voice and Video — Step-by-Step
- Seal gaps and cracks: Use weatherstripping or acoustic sealant around door edges and outlets to block sound leaks. This prevents sound from escaping or entering through unsealed openings, which can cause echo and background noise. The tradeoff is that over-sealing can make ventilation difficult, so plan for airflow.
- Cover the walls: Attach thick foam panels, blankets, or acoustic curtains to absorb reflections. Focus on reflection points behind and beside the mic because these are the primary sources of echo. Proper placement of these treatments ensures a balanced sound environment, reducing muddiness and flutter echoes that can distort recordings.
- Add bass traps: Place bass traps in the corners to tame low-frequency buildup, which can cause boomy, muddy recordings. Ignoring low-frequency issues often results in recordings that sound hollow or boomy, especially in small, parallel-walled spaces. Proper placement of bass traps is a tradeoff—too many can deaden the sound excessively, too few leave low-end issues unresolved.
- Treat the door: Hang a heavy blanket or install an acoustic door seal kit to prevent sound escape. This step is crucial in smaller spaces where sound can easily leak through gaps. While sealing improves soundproofing, it can make the space less ventilated, so consider combining with ventilation solutions.
- Control reflections: Rugs and foam on the floor and ceiling soften echo and flutter echoes inside the space. These treatments help achieve a natural sound without the need for excessive electronic processing. Remember, the goal is to balance absorption and reflection for a natural, clear tone.
Real-world example: a podcaster used foam panels on the walls, a thick blanket over the door, and corner bass traps. Her voice now sounds warm, clear, and free of room echo. For more tips on treating small spaces, see room treatment tips.
Want a detailed guide? Check out [room treatment tips for small spaces](https://www.secondskinaudio.com/soundproofing/furnace-closet-soundproofing/).

Professional Studio Recording Microphone Isolation Shield, Pop Filter,High density absorbent foam is used to filter vocal. Suitable for Blue Yeti and other condenser microphones (AO-504 With Stand)
♪【The package contains】♪: Microphone Isolation Shield x 1, Metal Thread Adapter x 2 (Adapt most microphones), Adjustable Stand...
As an affiliate, we earn on qualifying purchases.
As an affiliate, we earn on qualifying purchases.
The Truth About Foam, Absorption, and Soundproofing
Foam is great at controlling echoes and flutter inside a small space, but it doesn’t stop sound from leaking out. Think of foam as softening the inside of a drum—less echo, but sound still escapes through cracks and gaps. Without proper sealing, all your efforts in absorption are compromised, as sound can easily leak through unsealed points, rendering your treatments less effective.
For real soundproofing, you need dense materials and sealing. Combining thick acoustic panels with weatherstripping and mass-loading the door makes a big difference. This layered approach ensures that sound is both absorbed inside and blocked from escaping.
In a tiny closet, covering 70-80% of the walls with foam can make a noticeable difference in voice clarity. But sealing the door and cracks is even more effective, especially for voiceover work, because it prevents sound from leaking out and reduces background noise from outside sources. The tradeoff is that sealing can make the space less ventilated, so you need to balance noise reduction with airflow.
Learn more about balancing absorption and sealing at soundproofing fundamentals.
Blocking Sound Leaks—Seal the Gaps, Block the Noise
Sound leaks through doors, gaps, and outlets. Sealing these is the secret to making your closet a true quiet zone. Use weatherstripping around the door frame, acoustic sealant in cracks, and hang a heavy blanket or curtain over the door. These measures prevent sound from escaping and entering, which is especially important in small, enclosed spaces where even tiny leaks can significantly impact sound quality.
A small but powerful trick: place a foam panel or blanket over any gap around the door. It’s cheap, easy, and surprisingly effective at reducing noise transmission. Keep in mind, sealing all leaks can make the space less ventilated, so plan for alternative ventilation solutions if needed.
For example, a voice actor added weatherstripping and a quilted blanket over her closet door. Her recordings went from muffled to professional-quality, with no sound sneaking out. This highlights how simple sealing techniques can dramatically improve sound isolation without complex equipment.
Floor and Desk: Small Details That Make a Big Difference
Hard floors and reflective desks can bounce sound back into your mic, muddying your recordings. Adding rugs, carpets, or foam mats can absorb that unwanted reflection. Even placing a foam pad under your mic stand reduces flutter echoes. These small details prevent sound from bouncing and creating comb filtering or echo artifacts that degrade clarity.
Think about your desk surface—if it’s shiny or hard, it’s bouncing sound. Cover it with a cloth or foam to keep your voice natural and clear. This prevents high-frequency reflections that can make recordings sound harsh or unnatural. The tradeoff is minimal—adding these simple materials often results in a significant improvement in sound quality, especially in small, reflective spaces.
One creator layered a thick rug and placed a foam pad under her mic stand. Her voice suddenly gained warmth, and room echo disappeared. Paying attention to these tiny details can elevate your recordings from average to professional-grade.
Frequently Asked Questions
Can I just put foam panels on the walls and call it a day?
Foam panels reduce echo and flutter inside the room, but they won’t stop sound from leaking out. For proper soundproofing, you need to seal gaps and add dense materials for blocking sound transmission.
How do I prevent my closet from overheating?
Use ventilation—passive vents or quiet exhaust fans—and consider ducting hot air outside. For high-power rigs, check out [cooling strategies](https://thorstenmeyerai.com/reduce-heat-noise-ai-workstation/) that keep everything cool and quiet.
What’s better for low-frequency issues—bass traps or foam?
Bass traps in the corners are best for low-end buildup, especially in small, parallel-walled spaces. Foam mainly tackles high-frequency reflections. Combining both gives the best overall sound.
Should I treat the ceiling and floor too?
Yes! Hard floors bounce sound, and untreated ceilings can cause flutter echoes. Use rugs, foam, or acoustic panels to soften these surfaces and improve clarity.
Conclusion
Turning a closet into a quiet, high-quality audio space isn’t about magic—it’s about strategy. Seal gaps, treat reflection points, and give your rig proper ventilation. The result: cleaner sound, less noise, and a space that works as hard as you do.
Remember, the best setup is one that prioritizes placement and sealing over endless foam. Your voice, and your ears, will thank you for it.