Make a science-themed Halloween costume that communicates one clear idea, feels comfortable to wear, and holds together through an event. This guide is for beginners, families, and anyone assembling a costume at home, with options for scientists, astronauts, planets, lab equipment, and scientific concepts. Plan for about 1–3 hours, depending on how much you build and decorate.

Prime made for students and young adults
- Fast, free delivery for dorm and study essentials
- Prime Video and Amazon Music included
- Member-only deals

Mepase Halloween Professor Costume Set, 5 Pieces
- ✔ Included items: Lab coat, necktie, plastic pipe, 2 pens
- ✔ Piece count: 5
- ✔ Coat material: Polyester-cotton

Keymall Kids Mad Scientist Costume Set, 6 Pieces
- ✔ Included items: Lab coat, wig, goggles, gloves, fake eyebrows and mustache, bow tie
- ✔ Piece count: 6
- ✔ Materials: Polyester, cotton, plastic, rubber, synthetic fibers

Keymall Mad Scientist Costume for Girls – Lab Coat, Goggles, Bow Tie & Hair Extensions for Halloween Dress Up
- ✔ Included items: Lab coat, goggles, 6 hair extensions, bow tie, prop beaker
- ✔ Listed piece count: 10
- ✔ Materials: Polyester, plastic, rubber, fibers
You will choose a theme, check the event rules, gather clothes and craft materials, assemble the main costume, and test it before wearing it. A successful costume is easy to recognize from a few steps away, safe to move in, and made without real hazardous chemicals or equipment.
Difficulty: Beginner | Time: 1–3 hours
What You’ll Need
Tools & Materials:
- Comfortable base clothing in a suitable color
- Cardboard, paper, or lightweight craft foam
- Scissors
- Tape or non-toxic craft glue
- Markers, paint, or colored paper
- String, elastic, or safety pins for attachment
- Optional: a lab coat, clear plastic sheet, simple toy telescope, or battery-powered lights
Knowledge:
- Basic cutting, drawing, and simple assembly
- Ability to check the event’s costume and prop rules
- For a child’s costume, an adult should handle sharp tools and hot glue
Set aside 1–3 hours, including a short fitting and movement check. Use materials already available where possible. Keep the costume lightweight, avoid items that block vision or breathing, and leave real lab chemicals, glassware, lasers, flames, and sharp tools out of the design. If the wearer has sensory or mobility needs, choose soft, flexible materials and test the outfit while seated and walking.
Mepase Halloween Professor Costume Set, 5 Pieces
The Mepase set is the clearest choice for shoppers who picture a professor or laboratory instructor rather than a child-sized mad scientist. Its white XL lab coat anchors the outfit, and a necktie, plastic pipe, and two pens provide quick character cues. Compared with the two Keymall sets, which use wigs, goggles, and more theatrical accessories to create a mad scientist persona, Mepase keeps the look restrained and easier to adapt for a school performance or career day.That simplicity is also the main limitation. The listing specifies only an XL coat, so buyers needing another size should look elsewhere or confirm availability before relying on this set. The plastic pipe is a costume prop, not a substantial accessory, and the set does not include the wig or goggles that make the children’s Keymall options more immediately eccentric. Still, its machine-washable polyester-cotton coat is a practical feature for a costume likely to be worn at more than one event.
Pros:
- Five coordinated pieces establish a recognizable professor character.
- XL is explicitly listed for the coat.
- Machine-washable polyester-cotton coat suits repeat use.
- Can work for Halloween, career day, theme parties, and performances.
Cons:
- Only an XL coat size is specified.
- The included pipe is plastic and functions as a costume prop.
Best for: Adults or older performers seeking a professor-style science costume with a specified XL coat and reusable outfit pieces.
Not ideal for: Shoppers who need a child’s size, a choice of coat sizes, or a highly theatrical mad scientist look built around goggles and a wig.
Bottom line: We recommend Mepase for a straightforward professor costume, provided the specified XL coat fits the wearer.
“We recommend Mepase for a straightforward professor costume, provided the specified XL coat fits the wearer.”
Keymall Kids Mad Scientist Costume Set, 6 Pieces
For children who want the instantly recognizable mad scientist formula, this Keymall set provides a more theatrical starting point than Mepase’s professor outfit. The wig, goggles, gloves, fake eyebrows and mustache, and bow tie add character details around the lab coat, making the costume feel like a complete disguise rather than professional attire. The goggles can sit over the eyes or on the forehead, giving families a little flexibility in how they style the look.Compared with the girls’ Keymall set, this one emphasizes a classic scientist wig and facial-hair effect instead of colored clip-in extensions and a prop beaker. That makes it a better fit for a familiar, slightly wacky lab character, but less distinctive if the wearer wants bright hair or a handheld science prop. The listing says the coat is machine washable, though its size information appears only in a picture; check that image carefully before buying, especially if the costume needs to fit over everyday clothes.
Pros:
- Six coordinated costume components create a classic mad scientist character.
- Goggles can be worn over the eyes or pushed onto the forehead.
- Machine-washable coat is useful after school or party wear.
- Designed for Halloween as well as career day and science projects.
Cons:
- Sizing details are provided in an image rather than clearly in the written description.
- Screen differences may affect how the costume colors appear.
Best for: Children who want a traditional, accessory-rich mad scientist costume for Halloween, parties, or a school science project.
Not ideal for: Families who need clearly written size measurements or a colorful hair-and-beaker look instead of a wig and fake facial hair.
Bottom line: We’d choose this set for a child who wants the classic wig-and-goggles scientist disguise, after confirming the pictured sizing information.
“We’d choose this set for a child who wants the classic wig-and-goggles scientist disguise, after confirming the pictured sizing information.”
Keymall Mad Scientist Costume for Girls – Lab Coat, Goggles, Bow Tie & Hair Extensions for Halloween Dress Up
This Keymall option makes the science costume feel more expressive and colorful than the other children’s pick. Along with a printed lab coat, goggles, and bow tie, it includes six clip-in colored hair extensions and a prop beaker. Those details give the wearer a more individualized character than the wig-and-fake-facial-hair approach in Keymall’s six-piece set. For a child who wants an eccentric scientist look with bright accents, the extensions are the defining difference.The advertised ten pieces count the coat, goggles, six extensions, bow tie, and beaker; that is a broader assortment than Mepase’s adult professor set, though the two serve different audiences and costume styles. The coat is described as machine washable on a gentle cycle, with low tumble drying, and the product description says it is designed to resist fading and deformation. Buyers should still note that the size is not clearly specified in the written details. Color may also vary by screen, and the set’s playful styling may not suit a child who prefers the more traditional wig-and-goggles character.
Pros:
- Includes six clip-in colored hair extensions for a distinctive look.
- Prop beaker adds a science-themed accessory beyond the lab coat and goggles.
- Machine-washable coat has specific gentle-cycle care guidance.
- Useful for Halloween, parties, career day, and school science projects.
Cons:
- Sizing is described only as shown in a picture.
- Colors may look different from the listing images on some screens.
- The colorful styling may be less versatile than the classic wig-based set.
Best for: Kids who want a bright, personalized mad scientist costume with clip-in hair color and a prop beaker.
Not ideal for: Buyers who need clear written size measurements or children who prefer a conventional scientist disguise without colorful hair accessories.
Bottom line: We’d pick this set when colorful hair extensions and a beaker matter more than conventional mad scientist styling or clearly stated sizing.
“We’d pick this set when colorful hair extensions and a beaker matter more than conventional mad scientist styling or clearly stated sizing.”
As an Amazon Associate we earn from qualifying purchases.
Before You Start
Check whether the party, school, workplace, or venue has rules about masks, toy weapons, liquids, lights, or oversized accessories. Choose an idea that fits those rules and the weather. For outdoor events, plan for a warm layer that can go under or over the costume. Keep the wearer’s face visible, use reflective details for evening walking, and make props soft and easy to remove.
Pick one main science idea rather than combining several unrelated ones. A white coat and name badge can read as a scientist; a dark outfit with paper stars can suggest space; a labeled cardboard ring can turn a plain shirt into a planet. Familiar shapes and a few clear labels usually communicate more than elaborate decorations.
Step-by-Step Instructions
Step 1: Choose one recognizable science theme
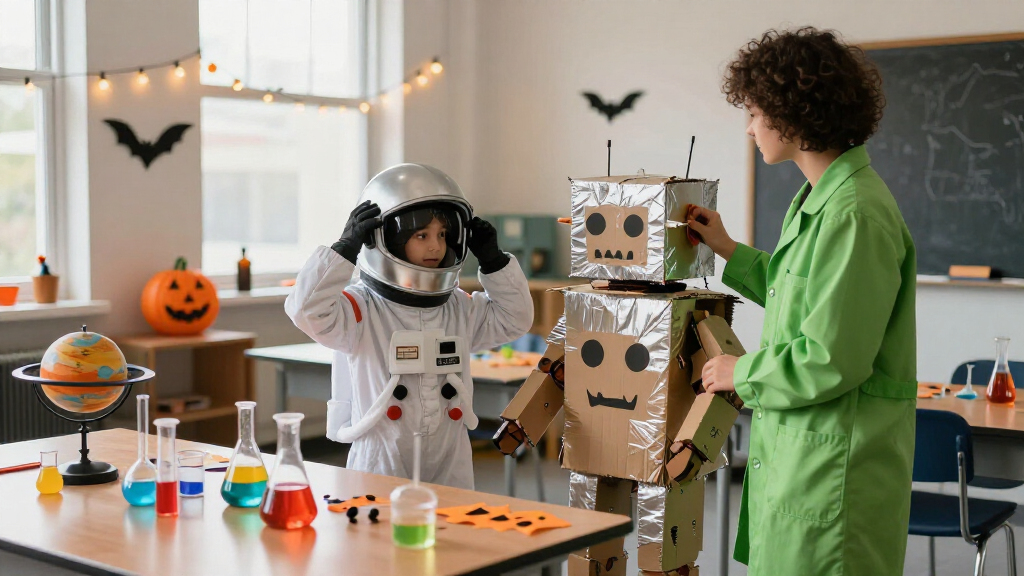
Select a person, object, or concept that can be shown with a few visual clues. For a scientist, use a coat, goggles worn on the head, and a name badge. For an astronaut, use a light-colored outfit, a cardboard control panel, and a safe helmet shape made from a soft or open-faced material. For a planet, decorate a single-color outfit with circles, rings, and a clear planet name. For a microscope or test tube, build a simple sign or wearable shape from cardboard.
Write down the theme and three clues that will make it recognizable. For example: “astronaut” could use a mission patch, silver details, and a labeled control panel. Avoid choosing a design that depends on a mask, a heavy structure, or a prop the wearer must hold all evening.
Tip:Choose a theme the wearer enjoys and can explain in one sentence. A familiar idea is easier for guests to recognize than an obscure reference.
Check: Someone who has not heard the plan can guess the theme from the three clues you chose.
Step 2: Set the comfort and safety limits
Lay out the base clothes and decide where each costume piece will sit. Check that the wearer can see clearly, breathe freely, raise both arms, sit down, and walk without stepping on fabric or catching an accessory. Keep decorations away from the mouth, nose, and eyes. Replace rigid headgear with an open hood, headband, or hat if it limits vision.
Use lightweight cardboard or foam for large shapes, and attach pieces with fabric-safe tape, elastic, or safety pins placed away from skin. Keep cords short and secured. Do not add real glass, dry ice, chemicals, sharp metal, flames, or powered devices that could heat up. If using small battery lights, cover the battery pack securely and follow its instructions.
Tip:For young children, skip loose small pieces, long cords, and accessories that can detach. Have an adult supervise cutting and any glue that needs heat.
Check: The wearer can move, sit, and turn their head without the costume shifting into their face or restricting movement.
Step 3: Gather materials and make a simple layout
Collect the base outfit, decoration materials, attachment supplies, and any permitted props. Put everything on a table before cutting or gluing. Sketch a quick front view of the costume and mark where the main clue, labels, and smaller details will go. Use large shapes for the central idea and reserve small details for accents.
Try household items first: a plain shirt can serve as a base, a cereal box can become a control panel, and paper circles can represent atoms or planets. Cover printed packaging with plain paper if its graphics distract from the theme. Make labels large enough to read at ordinary conversation distance. Gather spare tape and one backup attachment method, such as a pin in addition to adhesive.
Tip:Test glue or paint on a hidden area of the fabric before decorating the full garment. Some finishes can stain or stiffen clothing.
Check: All planned materials are available, and the sketch shows a clear focal point with space for the wearer’s face and movement.
Step 4: Build the main costume pieces
Start with the largest, most recognizable piece. Decorate a lab coat with a name badge and simple symbol, or attach a cardboard control panel to the front of an astronaut’s shirt. To make a planet costume, add broad rings or contrasting circles to a shirt or cape. Keep cardboard panels flat and rounded at the corners so they do not poke or snag.
Attach the main piece with tape, elastic, or a few secure pins. Add secondary clues after the main piece is in place: a paper patch, a simple diagram, a safe toy instrument, or a few labeled shapes. Use only enough detail to support the theme. Avoid filling every surface with text or decoration, because visual clutter can make the idea harder to read.
Tip:Make detachable props separately when possible. A sign or panel that clips on is easier to adjust, store, and remove at the event.
Check: The main costume piece stays in place when the wearer walks and turns, and its edges do not scratch or catch on clothing.
Step 5: Add labels and finish the details
Add one or two short labels that clarify the science idea. Use simple words such as “Mars,” “Astronaut,” “Lab Crew,” or “Atom.” Check spelling and place lettering where it can be seen without covering the face. Add color contrast so the label stands out against its background.
Finish with small details that match the theme, such as paper stars, a drawn molecule, a mission patch, or colored dots. Avoid presenting real substances as costume decorations, and do not use food, powders, or liquids that can spill or irritate skin. If the outfit needs a hat or goggles, check that they sit securely and do not obscure hearing or vision.
Tip:Take a photo from several steps away. If the main theme is hard to identify in the photo, enlarge the central symbol or remove competing details.
Check: The label is readable, the theme remains clear at a distance, and no small decoration is loose.
Step 6: Fit and test the full outfit
Have the wearer put on the full costume with the shoes and outer layers they will use at the event. Walk across the room, turn, sit, stand, raise both arms, and practice carrying or attaching any prop. Check that hems do not drag, panels do not swing into the wearer, and nothing blocks the wearer’s view or makes it hard to hear.
Make adjustments now. Shorten a loose strap, move a panel away from the knees, secure a battery pack, or remove a piece that keeps slipping. If the costume is for a child, confirm that they can take off any removable piece without help and know where it is stored. Pack a small repair kit with tape, a spare pin, and an extra label if the event is long.
Tip:Try the costume in the lighting expected at the event. Add a reflective strip or bright trim if the wearer will walk outdoors after dark.
Check: The wearer can complete the movement check comfortably, and the main theme is still easy to recognize after the test.
Common Mistakes to Avoid
- Adding too many science ideas and decorations — Choose one theme and three main visual clues. Remove decorations that do not help someone identify that theme.
- Using a mask, helmet, or prop that blocks movement or sight — Keep the face open, use lightweight materials, and test walking, turning, and sitting before the event.
- Relying on adhesive that does not hold to fabric — Test it on a hidden spot first and add a pin, elastic loop, or sewn attachment for pieces that must stay secure.
- Using realistic laboratory items or hazardous materials — Use cardboard, paper, plastic, and clearly pretend props. Leave real chemicals, glass, flames, and sharp tools out of the costume.
Troubleshooting
Problem: The costume theme is hard to recognize
Solution: Make the largest clue more prominent, add a short readable label, and remove details that point to other themes. Ask someone unfamiliar with the plan to identify it from a photo.
Problem: A panel or decoration keeps falling off
Solution: Remove the piece, clean and dry the attachment area if needed, then secure it with a second method such as elastic or a safety pin. Recheck movement before wearing it.
Problem: The outfit feels hot, stiff, or uncomfortable
Solution: Remove a layer or rigid piece, switch to breathable base clothing, and keep decorations on a removable panel rather than across the whole garment.
Problem: The costume is difficult to see in evening light
Solution: Add reflective tape or bright trim to the outside, keep the face visible, and use only permitted battery-powered lights with the battery pack secured.
What Success Looks Like
The finished costume has one clear science theme, at least one recognizable visual clue, and any needed readable label. It fits over the wearer’s planned clothing, stays attached during walking and sitting, and leaves vision, breathing, and movement unrestricted. The wearer can explain the idea in a sentence, and another person can identify it without a long explanation.
Next Steps
Pack the costume with its repair kit and any detachable pieces in a labeled bag. After the event, remove pins and batteries before storing the outfit. Follow the care instructions for painted or glued clothing, and keep cardboard pieces flat and dry. Save reusable pieces such as badges, rings, and panels for another costume; replace damaged attachments before storing them.
Frequently Asked Questions
What is the easiest science-themed costume to make?
A scientist is one of the simplest options: wear a comfortable outfit with a coat or white shirt, add a name badge, and draw or attach one science symbol. A planet made from a solid-color shirt and paper circles is another quick choice.
How can I make a costume without buying special supplies?
Use a plain shirt or jacket as the base, then make labels, symbols, and panels from scrap paper or clean cardboard. Household tape, washable markers, and reused fabric can supply most details. Check that reused materials are clean and have no sharp edges.
How can I make the costume suitable for a school event?
Check the school’s rules first. Keep the wearer’s face visible, use soft lightweight props, avoid liquids and realistic hazardous items, and make sure the child can move through hallways and sit in class.
Can I use lights or goggles?
Use battery-powered lights only if the event permits them, and secure the battery pack so it cannot fall or press against skin. Goggles can sit on the head as decoration if they do not slip over the eyes or interfere with hearing.
How do I adapt the costume for cold weather?
Choose a warm base layer in a color that fits the theme, then attach the main decorations to a coat, cape, or removable front panel. Test the complete outdoor layers together so the costume still fits and the wearer can move comfortably.