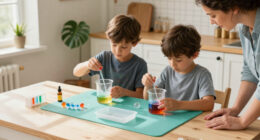

This guide helps a parent or caregiver choose a science experiment kit for a child, prepare the activity, and work through one experiment together. You will finish with a completed experiment, a record of what happened, and a child who can describe at least one observation. It is designed for adults with no specialist science background and children who can follow simple directions with age-appropriate help. Allow 30-90 minutes for choosing, setup, the experiment, and cleanup; the kit itself may include longer waiting periods.

Prime made for students and young adults
- Fast, free delivery for dorm and study essentials
- Prime Video and Amazon Music included
- Member-only deals
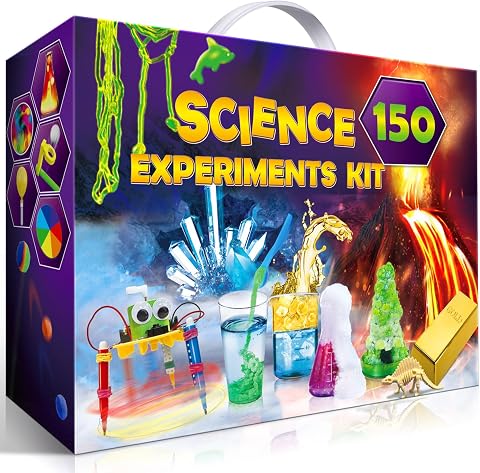
UNGLINGA 150 Experiments Science Kits for Kids Chemistry Lab S.T.E.MToys
- ✔ Activity count: 150 experiments stated
- ✔ Topics: Chemistry, physics, earth science, surface tension, and more
- ✔ Instructions: Illustrated, step-by-step manual
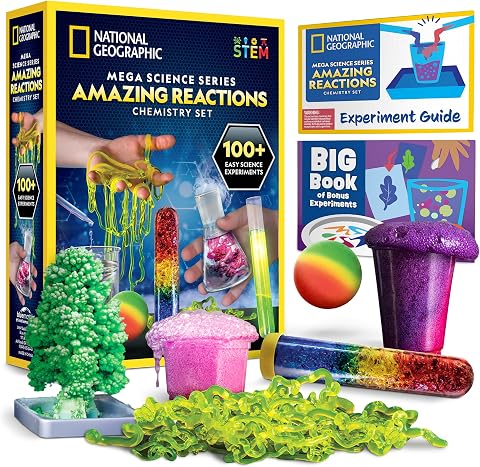
National Geographic Amazing Chemistry Set with 100+ Experiments Ages 8-12
- ✔ Activity count: 100+ total: 15 supplied-material experiments and 85 bonus activities
- ✔ Recommended age: 8–12 years; product information lists 8 years and up
- ✔ Subject: Chemistry

National Geographic Science Magic Kit with 100+ Experiments for Kids 8-12
- ✔ Activity count: 20 supplied-material magic experiments plus 85+ bonus activities
- ✔ Recommended age: 8–12 years; product information lists 8 years and up
- ✔ Format: Experiments designed as magic tricks
Difficulty: Beginner | Time: 30-90 minutes, depending on the experiment
What You’ll Need
Tools & Materials:
- A science kit labeled for the child’s age
- The kit’s instruction booklet and all listed components
- Protective items specified by the kit, such as safety glasses or gloves
- A stable, easy-to-clean work surface
- Paper or a notebook, pencil, and a timer if the experiment calls for one
- Water, paper towels, and a container for cleanup, when the instructions require them
Knowledge:
- Ability to read the kit instructions or explain them in simple language
- Basic comfort supervising a child around small parts and experiment materials
- No prior science training is needed
Read the full instructions and safety labels before opening materials. Check whether the kit calls for adult supervision, extra household supplies, a particular room, or time to wait between steps. Use only the kit’s stated materials and amounts. Do not taste, touch, or smell experiment materials unless the instructions explicitly say an action is safe. Keep food and drinks away from the work area.
UNGLINGA 150 Experiments Science Kits for Kids Chemistry Lab S.T.E.MToys
UNGLINGA earns the top position by aiming beyond a single branch of science. Its stated activities cover chemistry, physics, earth science, and surface tension, giving families more ways to follow a child’s changing interests than either National Geographic kit. That range matters when a young scientist is not yet sure whether bubbling reactions, physical effects, or earth-focused projects will hold attention longest.The illustrated, step-by-step manual is a practical strength for at-home projects, and the kit includes science tools and child-friendly materials. Still, the description says that many projects use ordinary household items, so 150 is the activity count, not a promise that every experiment has dedicated ingredients in the box. Compared with the National Geographic Chemistry Set, UNGLINGA advertises wider subject coverage, but its description gives less detail about how many experiments have all required materials included. Families should expect to help gather supplies and supervise setup.This is the most flexible pick for mixed-interest households or school-break activities. The tradeoff is focus: a child wanting a clearly chemistry-centered experience with named tools such as test tubes and pipettes may find the National Geographic set easier to evaluate. UNGLINGA makes more sense when variety is the deciding factor and an adult can help with preparation.
Pros:
- Describes activities across chemistry, physics, earth science, and surface tension.
- Illustrated, step-by-step experiment manual.
- Includes science tools and child-friendly materials.
- Household-supply activities can extend use beyond the supplied kit materials.
Cons:
- Many activities require common household items, so preparation may fall to an adult.
- The product details do not specify how many of the 150 experiments have all materials included.
- Broad subject coverage gives less emphasis to a single structured chemistry pathway.
Best for: Families seeking a broad set of guided activities across multiple science topics for shared home use.
Not ideal for: Children who want a tightly chemistry-focused kit with a clearly stated count of experiments supplied with all materials, or families who cannot gather household supplies.
Bottom line: Choose UNGLINGA when a wide mix of science topics matters more than a narrowly defined chemistry curriculum.
“Choose UNGLINGA when a wide mix of science topics matters more than a narrowly defined chemistry curriculum.”
National Geographic Amazing Chemistry Set with 100+ Experiments Ages 8-12
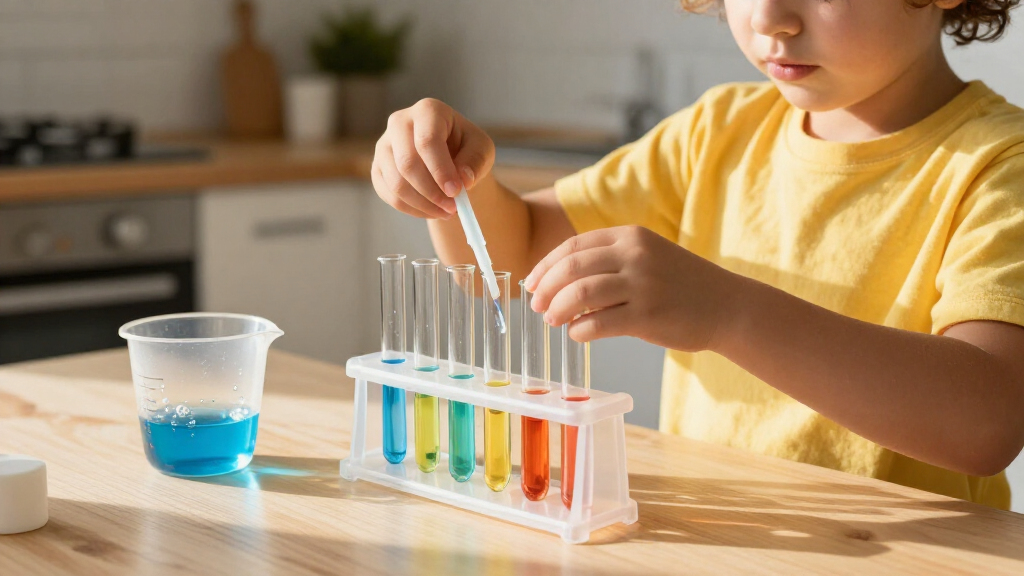
For a child drawn specifically to reactions, color changes, and crystals, this National Geographic set has the clearest chemistry identity in the lineup. Its examples include bubbling and color-changing solutions, glowing test tubes, and crystal growing, while beakers, test tubes, and pipettes give activities a recognizable lab feel. Those tools make it a more focused chemistry choice than UNGLINGA’s broader mix of subjects.The key distinction is how the total is counted: materials are included for 15 experiments, while the additional 85 activities in the bonus guide use common household items. That still offers plenty of follow-on ideas, but families should not read “100+” as 100 fully supplied experiments. Compared with the Science Magic Kit, this option puts the subject and lab tools at the center rather than building around a show-and-tell routine.The set is listed for ages 8–12, which helps establish its intended audience, though adult supervision and help gathering supplies may still be useful. Its drawback against UNGLINGA is narrower topic coverage; against the Magic Kit, it offers less built-in performance framing. We would choose it when chemistry itself is the attraction, and skip it if a child mainly wants varied science themes or ready-made tricks to present.
Pros:
- Includes materials for 15 specified chemistry experiments.
- Uses lab-style tools including test tubes, beakers, and pipettes.
- Examples include crystal growing, color-changing liquids, and chemical reactions.
- Bonus guide adds 85 household-supply activities.
Cons:
- Only 15 experiments are described as having all materials included.
- The additional activities require common household items.
- Chemistry focus is less varied than UNGLINGA’s cross-topic approach.
Best for: Children ages 8–12 who want chemistry activities, visible reactions, and familiar lab tools.
Not ideal for: Families who expect every activity in the headline count to come with kit materials, or children more interested in varied science topics or performance.
Bottom line: Pick this set for a more concentrated, tool-rich introduction to chemistry, while planning to supply household materials for the bonus activities.
“Pick this set for a more concentrated, tool-rich introduction to chemistry, while planning to supply household materials for the bonus activities.”
National Geographic Science Magic Kit with 100+ Experiments for Kids 8-12
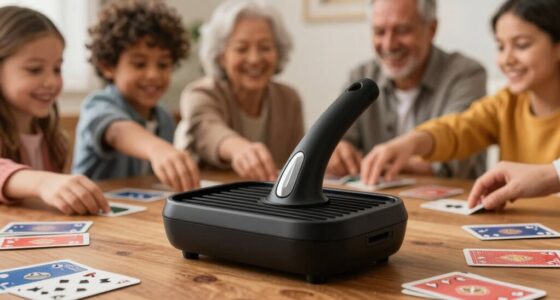
This kit gives experiments a social purpose: children can perform them as magic tricks for family and friends. The included activities feature effects such as a floating coin and a vanishing test tube, with a magic wand and white gloves supporting the presentation. That makes the kit more immediately showable than UNGLINGA’s broad project set or the chemistry-focused National Geographic option.Its guide pairs illustrated instructions with explanations of the science behind the effects, so the performance is tied to learning rather than being only a trick routine. The materials cover 20 magic experiments; a bonus guide adds 85 or more activities using common household items. As with the chemistry set, the headline total needs context: the supplied components are specified for the 20 core experiments, not every bonus activity.The specialization is also the limitation. Compared with the Amazing Chemistry Set, this one prioritizes surprising demonstrations over a lab-tool-centered chemistry experience; compared with UNGLINGA, it covers a narrower style of activity. We recommend it for children who like explaining and showing what they have learned. Skip it if the goal is a broad science sampler or a more systematic chemistry set.
Pros:
- Everything is included for 20 magic-style experiments.
- Wand and white gloves give demonstrations a performance format.
- Illustrated guide explains the science behind the effects.
- Bonus guide adds 85 or more household-supply activities.
Cons:
- The main set centers on magic-style demonstrations rather than broad science topics.
- Bonus activities require common household items.
- Less chemistry-tool focused than the Amazing Chemistry Set.
Best for: Children ages 8–12 who enjoy performing demonstrations and explaining the science behind surprising effects.
Not ideal for: Families seeking the broadest range of science subjects or a chemistry kit centered on lab tools and reaction practice.
Bottom line: Choose the Science Magic Kit when an audience and a reveal will motivate learning more than a broad experiment menu.
“Choose the Science Magic Kit when an audience and a reveal will motivate learning more than a broad experiment menu.”
As an Amazon Associate we earn from qualifying purchases.
Before You Start
Choose a time when you can stay with the child for the entire activity. Set aside any pets, food, and unrelated toys. Follow the kit’s age guidance and warnings, including supervision requirements. If the child has allergies or sensitivities, read ingredient and material labels before opening the kit. Do not use a damaged, unsealed, or incomplete kit; contact the seller or manufacturer for guidance. For an activity involving heat, sharp tools, electricity, or chemicals, follow the kit’s adult instructions exactly and do not improvise substitutions.
Step-by-Step Instructions
Step 1: Choose a kit that fits the child
Compare the age label, adult-supervision guidance, and the child’s interests before buying or opening a kit. Pick a subject the child is curious about, such as plants, rocks, magnets, weather, or simple reactions. Check the expected time and the number of experiments. For a first activity, favor a kit with clear illustrations, a manageable number of steps, and materials for one experiment that can be completed in one sitting.
Read the product details for anything the kit does not include. Some kits need household items, replacement parts, or several days of observation. Confirm that you can supply those items and supervise the activity before choosing it.
Tip: An age label is a guide to the instructions and small parts, not a measure of a child’s interest or ability. Choose adult help based on the actual task.
Check: You can name the experiment you plan to do, identify the adult’s role, and list any extra materials or waiting time before starting.
Step 2: Read the instructions and inspect the kit
Place the closed kit on the work surface and read the entire instruction booklet, including its warnings, before inviting the child to handle the contents. Match the listed items against the components in the box. Look for damaged containers, loose parts, unclear labels, or missing pieces. Keep small components away from young children and pets.
Choose one experiment to start with. Resist the urge to combine activities or skip ahead: the order, measurements, and waiting periods may affect the result. If a part is missing or a safety direction is unclear, pause and check the manufacturer’s support information before proceeding.
Tip: Set aside only the components needed for the chosen activity. This reduces mix-ups and keeps small parts organized.
Check: The components you need are present, labels are readable, and you understand the safety directions and sequence of the chosen experiment.
Step 3: Prepare a safe workspace
Clear a stable surface and move away food, drinks, clutter, and anything the experiment could damage. Gather only the extra supplies listed in the instructions, along with any specified protective gear. Keep the booklet visible. Set a container nearby for used materials and paper towels for spills, unless the kit gives different disposal directions.
Tell the child the boundaries before starting: where materials may go, which items only an adult handles, and what to do if something spills or breaks. Wash hands before the activity if the instructions request it, and follow any additional hygiene directions on the kit.
Tip: If the experiment requires water, heat, or materials that could stain, select the location and surface based on the kit’s warning labels.
Check: The work area is clear, the necessary supplies and protective items are ready, and both of you know who handles each part.
Step 4: Introduce the question and make a prediction
Read the experiment title and its question together. Ask the child what they think will happen, and invite them to explain their guess in their own words. Write the prediction in a notebook or on a sheet of paper. If the activity compares materials or conditions, record what the child thinks will be different.
Keep this conversation brief and let the child be wrong without correction. A prediction is a starting idea to compare with the observations, not a promise about the outcome. Explain any unfamiliar words from the instructions before beginning the procedure.
Tip: Use a question such as, “What do you think will happen if we follow these steps?” Avoid revealing the expected result before the child has a chance to guess.
Check: The child can say or draw a prediction, and you have recorded it before starting the experiment.
Step 5: Follow the experiment in order
Read one instruction at a time and let the child do the parts the kit assigns to children of their age. Measure, mix, assemble, or observe only as directed. Have an adult handle any part identified as adult-only. Use the specified amounts and timing; do not add extra materials, repeat a reaction, or change the setup to make a more dramatic result.
Pause after each step so the child can check what comes next. If you lose your place, stop and reread the booklet rather than guessing. Follow the kit’s directions for splashes, broken items, or accidental contact. Stop the experiment if a safety concern arises, and consult the kit’s instructions or manufacturer.
Tip: For a child learning to measure, point to the marked level and let them help while you check the amount. Keep the booklet’s safety directions in charge.
Check: You have completed the specified steps in the stated order, with the stated amounts and supervision.
Step 6: Observe and record what happens
Look at the result together before cleaning up. Ask the child to describe what changed, what stayed the same, and when the change appeared. Record observations using words, a simple drawing, or both. Add times or measurements if the instructions call for them. Separate what you actually saw from what you think caused it.
Compare the observations with the prediction. Ask whether the result matched, partly matched, or differed from the child’s guess. If the activity needs hours or days, note when to check again and where the setup must remain while it waits. Follow the booklet’s instructions for any unattended period.
Tip: Specific observations such as “the paper curled after five minutes” are easier to discuss than “it worked.”
Check: The child has at least one recorded observation and can say whether it matched the original prediction.
Step 7: Clean up as the kit directs
Follow the disposal and cleanup instructions in the booklet and on the material labels. Do not pour, rinse, recycle, or save leftover materials unless the instructions permit it. Have an adult manage disposal when directed. Return reusable components to the box only after they are clean and dry as specified. Wipe the work surface and wash hands after handling the experiment materials.
Store the booklet and any parts intended for future experiments together. Keep remaining materials in their original labeled containers, closed and out of children’s reach when the kit calls for secure storage.
Tip: If the instructions do not explain how to dispose of a material, do not guess. Check the manufacturer’s guidance before discarding it.
Check: The experiment materials are handled according to their directions, the surface is clean, and reusable parts are stored safely.
Common Mistakes to Avoid
- Starting before reading the whole instruction booklet. — Read the procedure, warnings, supply list, and timing requirements before opening or combining any materials.
- Changing measurements or adding extra ingredients. — Use only the stated materials and amounts. Changes can affect the result and may create a safety problem.
- Choosing a kit based only on its pictures or number of activities. — Check the age label, supervision level, extra supplies, total time, and safety directions before choosing.
- Treating a different result as a failed experiment. — Record what happened accurately, then check the order, measurements, and conditions. An unexpected observation can still be discussed and learned from.
Troubleshooting
Problem: A listed component is missing or damaged.
Solution: Stop before the step that needs it. Do not replace it with a household item unless the manufacturer says that substitute is suitable. Contact the seller or kit maker for a replacement or instructions.
Problem: The experiment result is hard to see.
Solution: Check whether the instructions specify a waiting period, lighting condition, or later observation. Keep the setup as directed and record what you can see; do not add materials or repeat steps without guidance.
Problem: The child wants to skip steps or rush through the activity.
Solution: Pause and read the next direction together. Explain that measurements, order, and waiting time help make the observation meaningful. Offer the child one safe, specific job for the next step.
Problem: A spill, breakage, or unexpected contact occurs.
Solution: Stop the activity and follow the kit’s safety and first-aid directions. Keep the child and pets away from the affected area. If the booklet does not cover the event, use the manufacturer’s contact instructions and seek appropriate medical advice for a possible exposure.
What Success Looks Like
The activity is complete when the child has taken part in the age-appropriate steps, you have followed the kit’s safety and measurement directions, and the child has recorded at least one observation. Ask the child to explain what happened and compare it with the prediction. A result that differs from the kit’s illustration can still count as a completed experiment if you followed the procedure and recorded the actual outcome. The work area should be cleaned and any remaining kit materials stored or discarded as directed.
Next Steps
Keep the child’s notes with the kit booklet so you can compare observations if you repeat the experiment. If you repeat it, change only one factor at a time and follow the kit’s instructions each time. Choose another activity based on the child’s questions, while checking its age guidance, safety information, and time needs before starting. Replace used components only with parts approved by the kit maker. Ask the manufacturer for help when directions, storage, or disposal are unclear.
Frequently Asked Questions
What age should a child be to use a science experiment kit?
Use the age range on the kit as your starting point. Check the warnings, small-part information, reading demands, and adult-supervision notes too. Stay with the child whenever the instructions require adult supervision, and adapt your help to the specific task.
Can I replace a missing kit material with something from home?
Only use a substitute when the kit maker or instructions explicitly approve it. Household materials can differ in concentration, size, or other properties, which may change the result or create a hazard. Pause and contact the manufacturer if a required part is missing.
What should we do if our result does not match the booklet?
Record the result you observed and compare it with the stated steps. Check that you used the correct amounts, sequence, and waiting time. Do not add materials to force the expected result. Contact the manufacturer if the instructions seem incomplete or a component may be faulty.
Can we leave an experiment set up and come back later?
Only if the instructions call for a waiting period and explain where and how to leave the setup. Follow any storage, supervision, and access warnings. Keep it away from children or pets when the booklet says to do so, and note when the next observation is due.
How can I help without giving the child all the answers?
Read directions aloud when needed, handle adult-only tasks, and ask the child to predict and describe what they see. Give them time to answer in their own words. Help them record the actual result, even when it differs from the booklet’s example.